
The Shed Project
The Shed Build Project
I've been wanting to build a new shed for several years now, partly to provide a bit of storage but mostly to give me somewhere to work on things for the house.
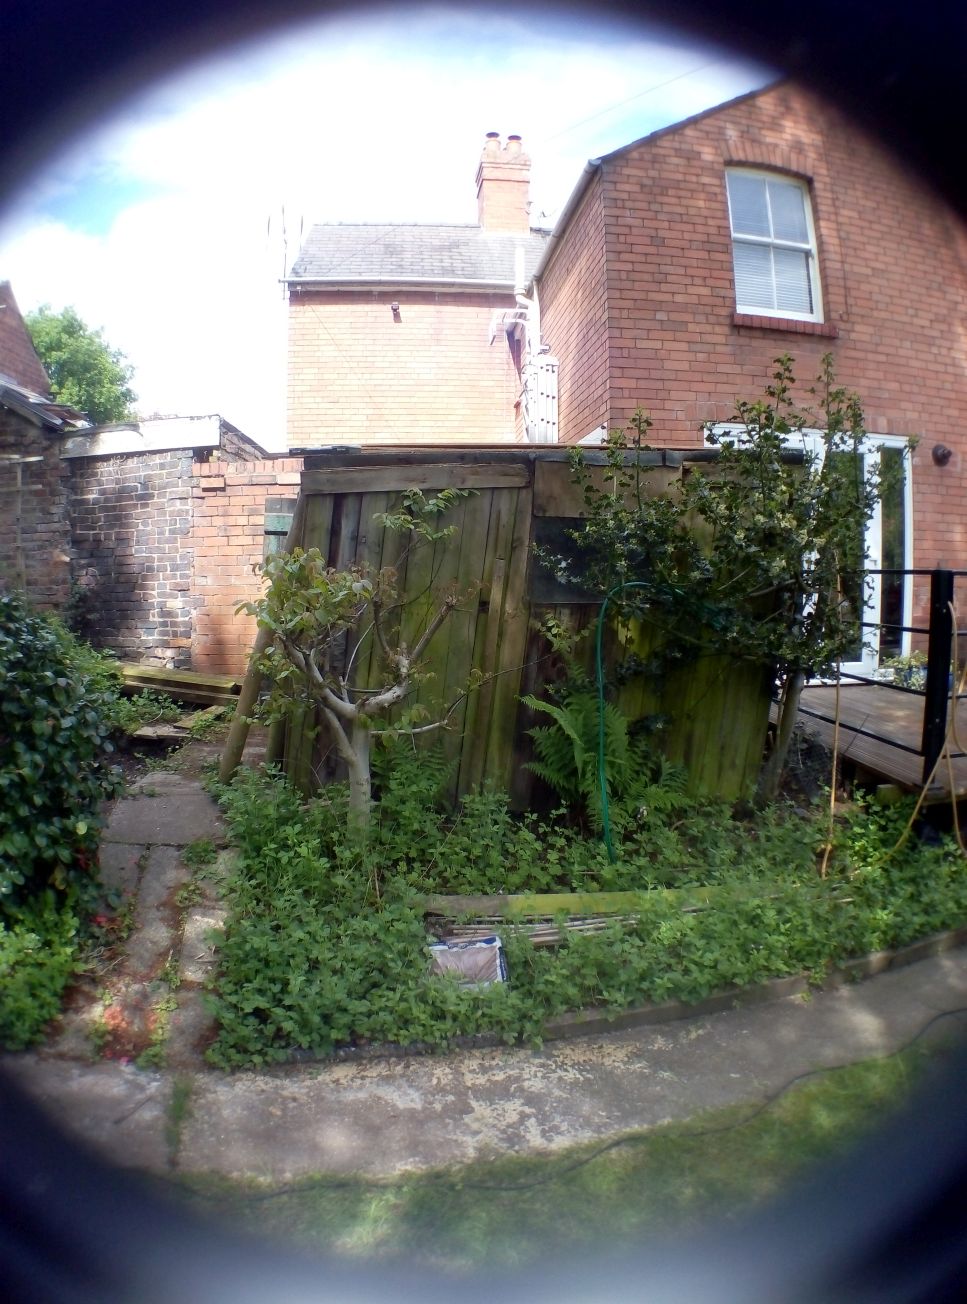
The old shed in the garden was years old and the only thing holding it up was the contents:
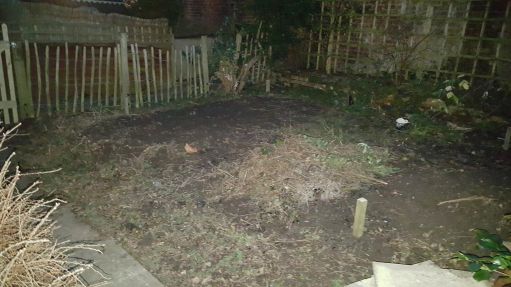
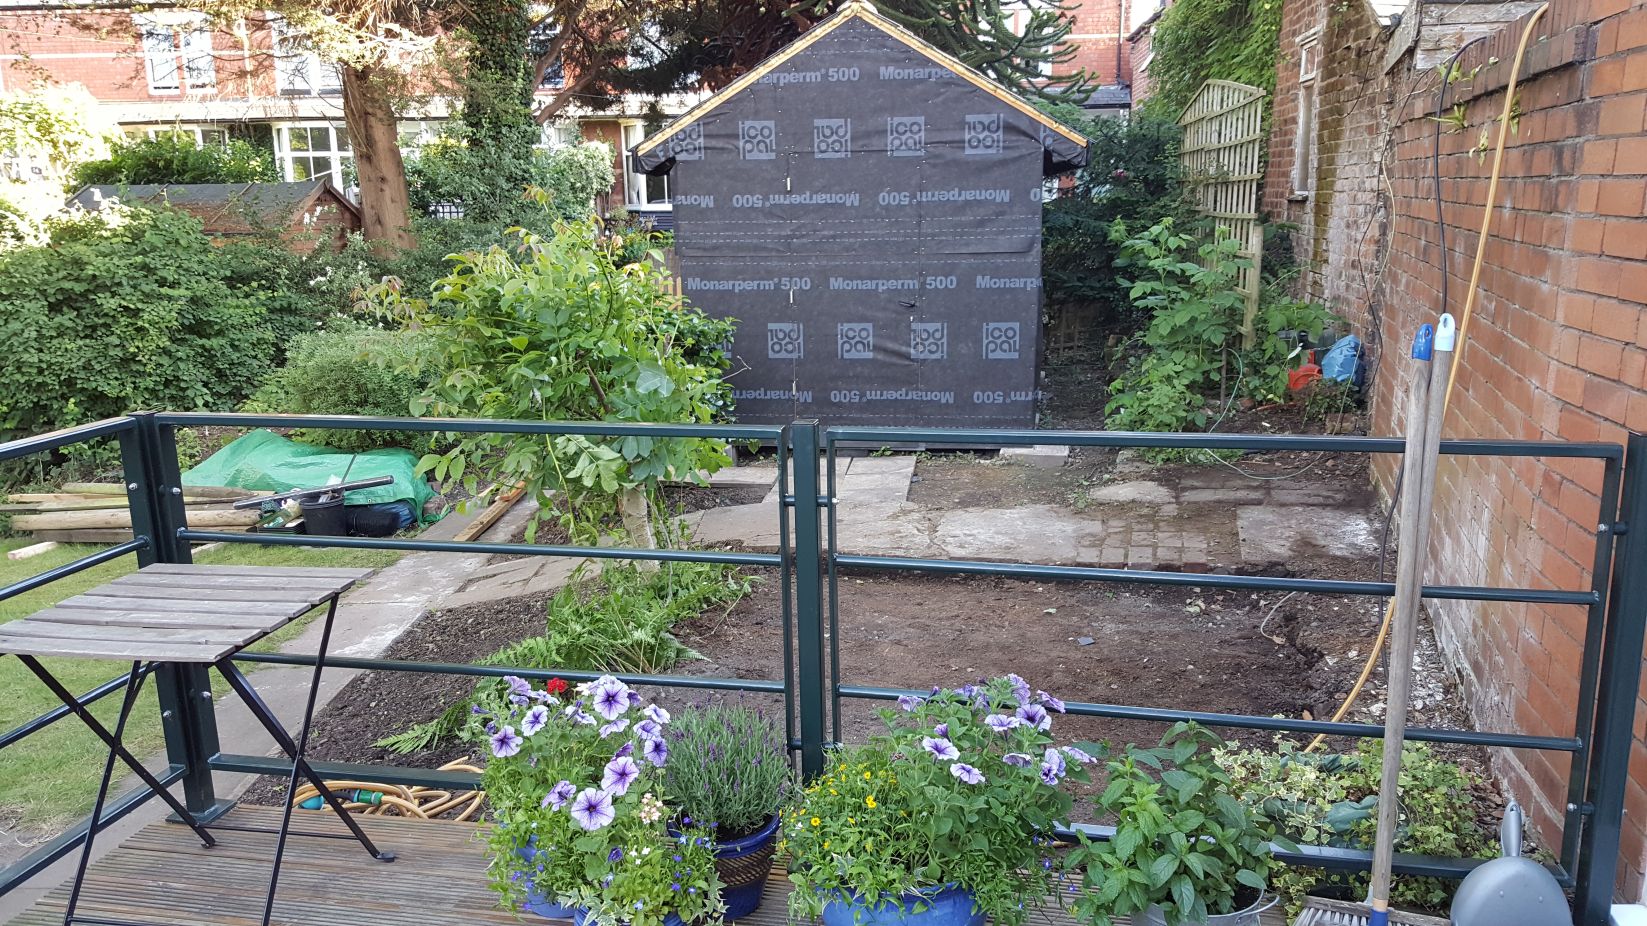
There is a patch of ground in the garden that has too much shade for growing anything useful and has been used as a storage space for garden waste awaiting disposal.
In the past I've had a bonfire once of twice a year to get rid of the shrubby bits and composted the green waste but last year I bought a garden shredder so now the shrubby bits end up as course material in one of the compost bins so I don't need to burn anything now.
I cleared the site before starting to lay out where the new shed was going to go:
Over Christmas 2016 I designed the shed using Sketchup to give me an idea of what sort of size I wanted to build. I worked around a 1.2m by 2.4m module (the size of a sheet of board) and used this size to create panels for the shed. The original plan was to build the shed in such a way that I could take it apart and sell it in the future, i.e., a temporary shed, but this plan changed into making it a permanent shed as I started to review how I wanted the shed to look and the sorts of materials I wanted to gain experience using.
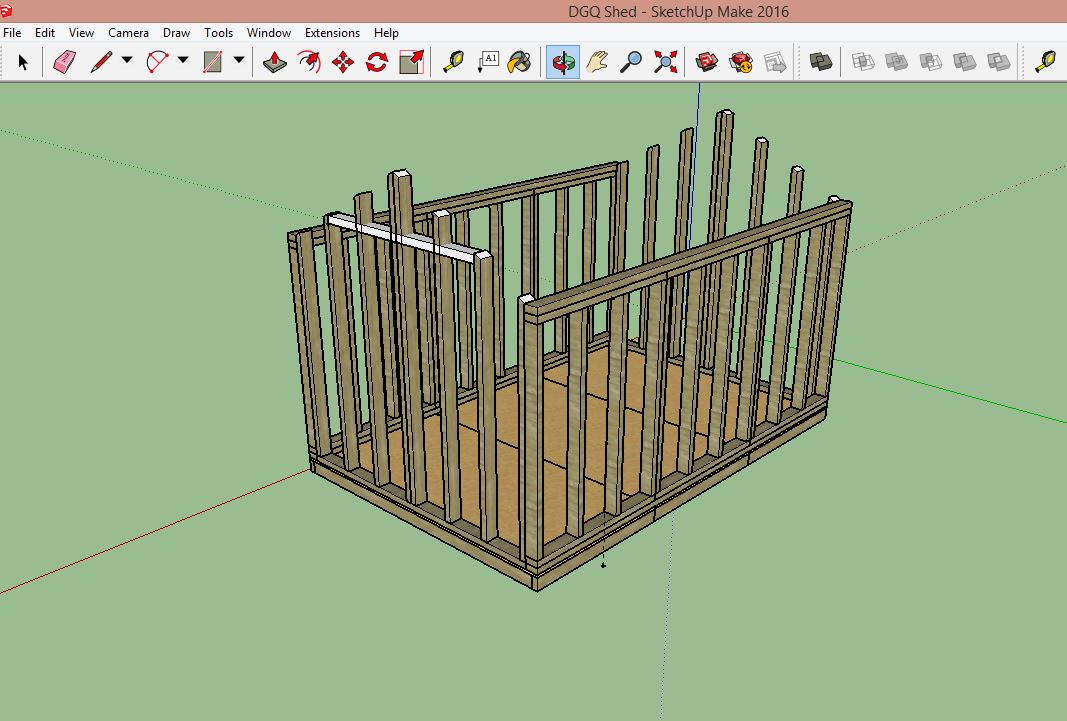
The model is pretty basic (like my CAD skills) and was used to help me visualise what I was trying to make. The basic materials of the shed are 11mm thick OSB and 98 x 45(mm) treated timber.
The floor panels are sheathed on the outside and the walls are sheathed on the inside with the 11mm thick OSB.
The site I chose wasn't level and had a fall off to one side. I didn't want to put the shed directly on the ground either as this would lead to early rot in the structure so I decided to put in some foundation piers to sit the shed on. This meant that the shed would be on a solid base and, with careful setting out of the form work, would not require any levelling as the shed was built.
I did have some photos of the footings under construction but due to an unsuccessful software update on my phone (Thanks a bunch O2!) I lost some of the photos.
Essentially, what I did was to dig eight holes in the ground, through the top soil and down into the subsoil. Each hole was then back filled with compacted, crushed building rubble. On top of each column of rubble I built a formwork about 300 by 300 mm. Each form work was built so that it was level and level to the other form works. The time spent here was well repaid: the tops of each pad are within 2 mm height of any other pad, in building terms that's level.
One mistake that I made was that I laid the formworks out on a grid 8' by 12' at the centre of the forms. This means that the footings are wider than the finished shed. I'll figure out what I'm going to do about that at a later date (probably extend the shed...)
Another issue I had was that I forgot to treat the inside of the formwork to stop the concrete from sticking to it. A brushed on coat of clean engine oil would have prevented the concrete sticking and made striking the formwork much easier. In the past I've made small pieces of formwork out of off cuts of green chipboard flooring sheet. This is treated to prevent moisture penetrating it and it makes excellent form work for this reason.On this occasion I had to make up a lot of form work so I bought in treated, sawn timber.
The overriding memory of putting the footings in was one of mud: it rained steadily most of the time I was doing the job.
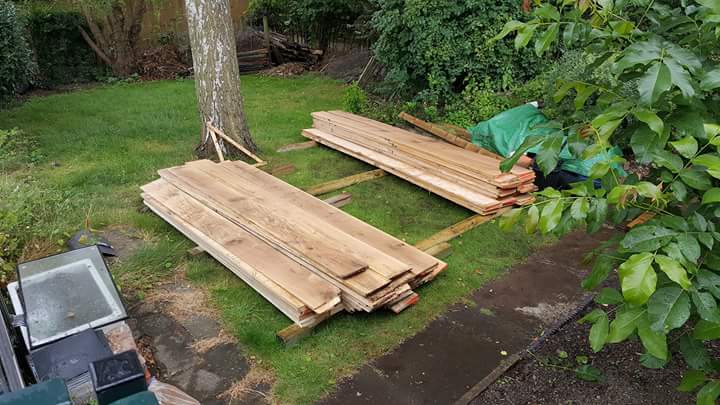
Then we had break of a few months while I planned the shed some more, worked out what materials I needed and went off and did some paying work.
Once we started on the build things happened very quickly. This is partly down to good planning, partly to having good tools and partly down to the modular construction. Oh, and I bought a second hand nail gun, an awesomely frightening tool that drives 100mm nails insanely and makes the framing go very quickly indeed.
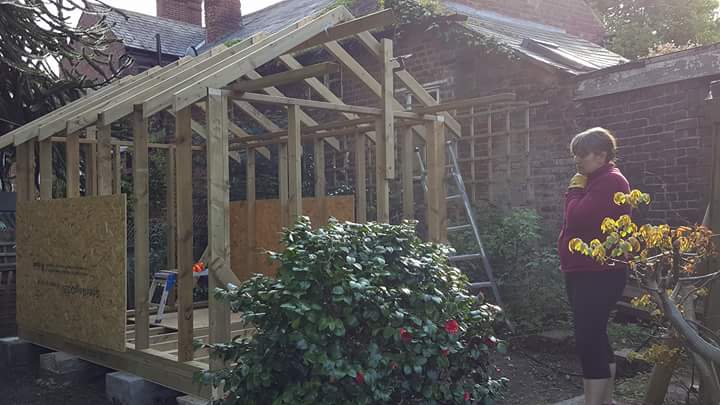
The end of day two of the framing.
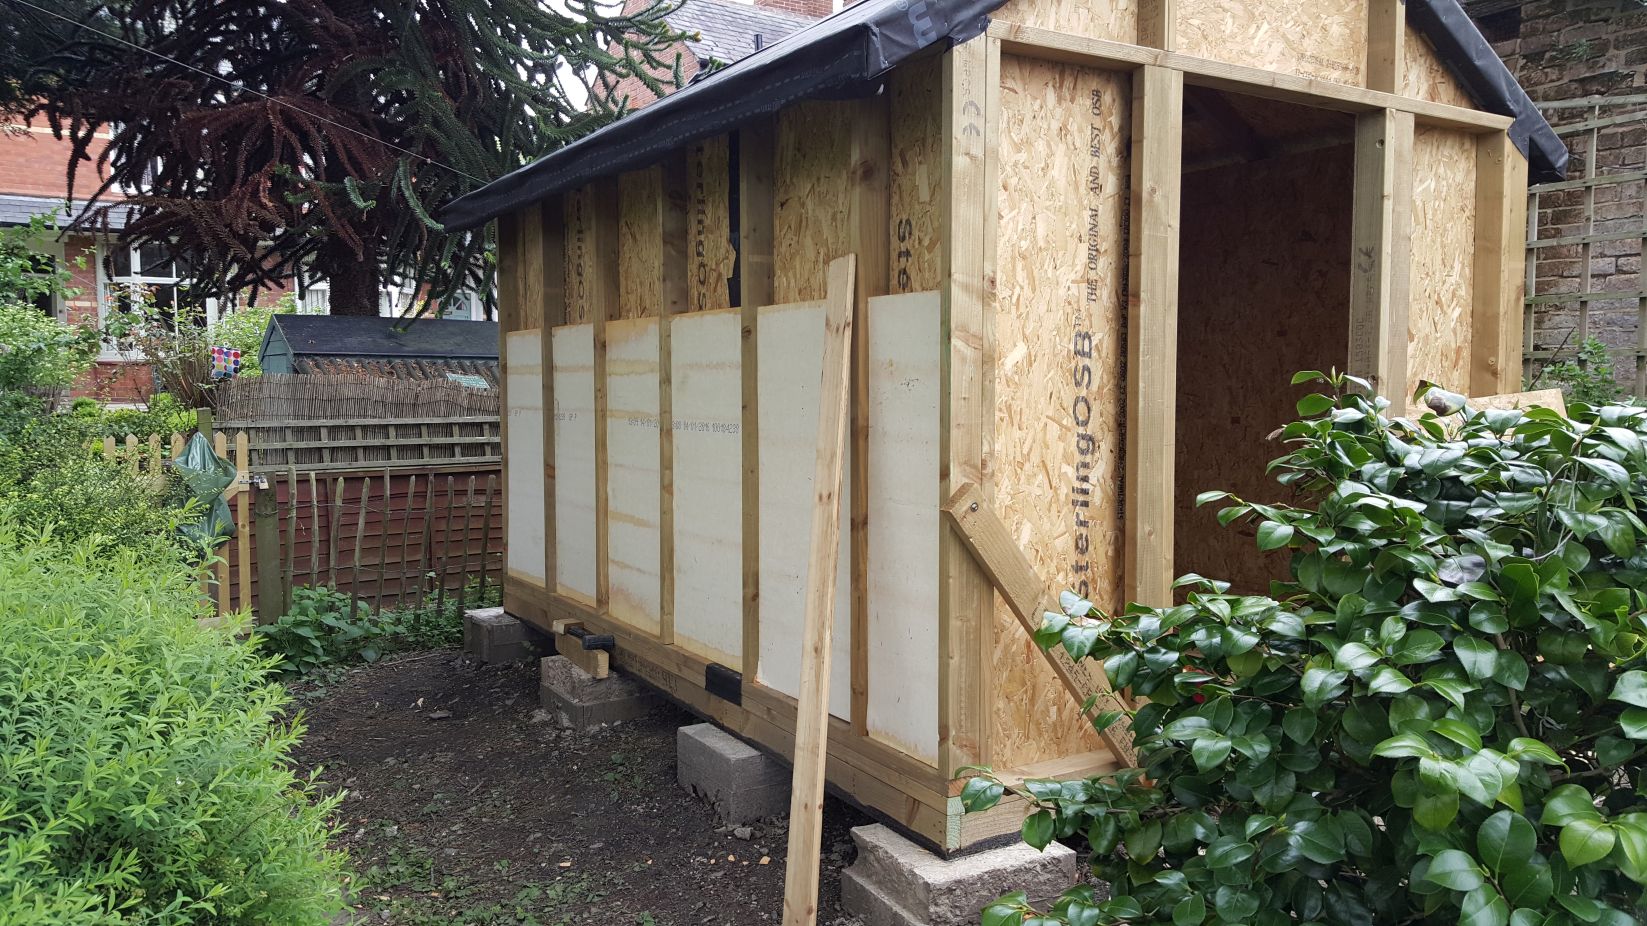
The sheets of OSB that you can see in the picture above were used to hold the frames square and to stiffen the whole thing prior to sheeting the insides. The strength of the construction comes from the combination of the 100 x 50 frame and the OSB. Together they form a very solid structure.The floor sections were assembled on the foundation blocks, the lengths of wood previously having been cut in batches. A pair of pieces of scrap were used at each end of the frame to position the studs prior to nailing them into position with the nail gun. At this point we weren't concerned about getting the frames absolutely square.
Once the three floor panel frames were made a sheet of OSB board was fixed along one edge only. Next a ratchet strap was used to pull on the diagonal of the frame to pull it until the frame was square. We used the OSB board as our reference for square. Having checked a few of the sheets they were found to be as square as my framing square, i.e., close enough. Once the frame was pulled square the OSB sheet was fixed along an edge adjacent to the first edge fixed. The strap was then removed and the other two edges were fixed.
When all three floor panels were completed they were laid side by side and clamped together using G clamps and a long piece of timber. With the floor panels clamped together the wall plates were placed on top of the floor panels and drilled and screwed in place. We also bolted the floor panels together in the middle of the span to prevent the sections moving relative to each other. I'm a great one for over engineering these things: a floor which moves about for want of an extra piece of stud work or a few extra bolts is completely unacceptable in my book.
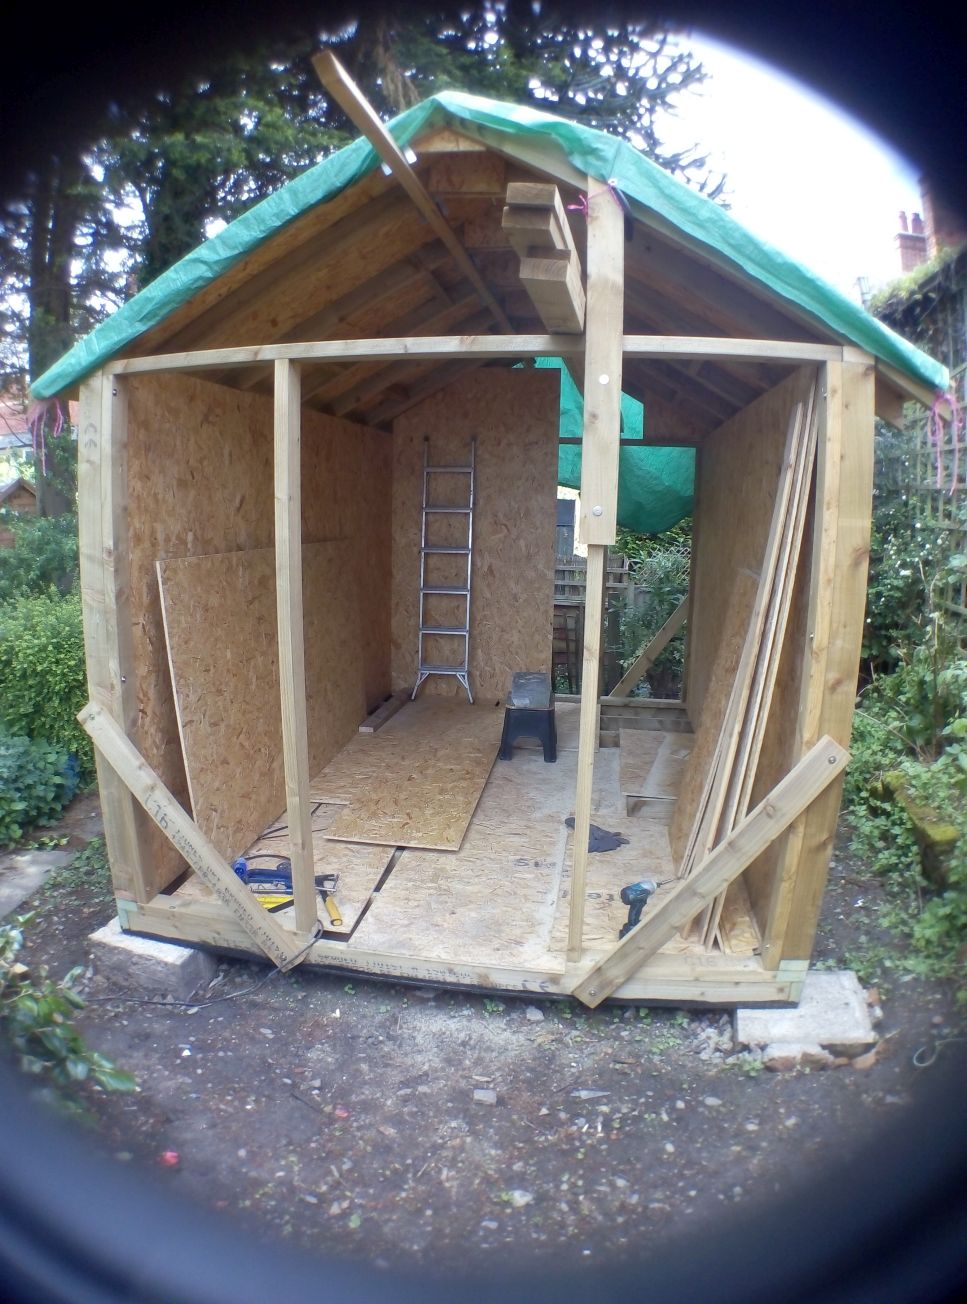
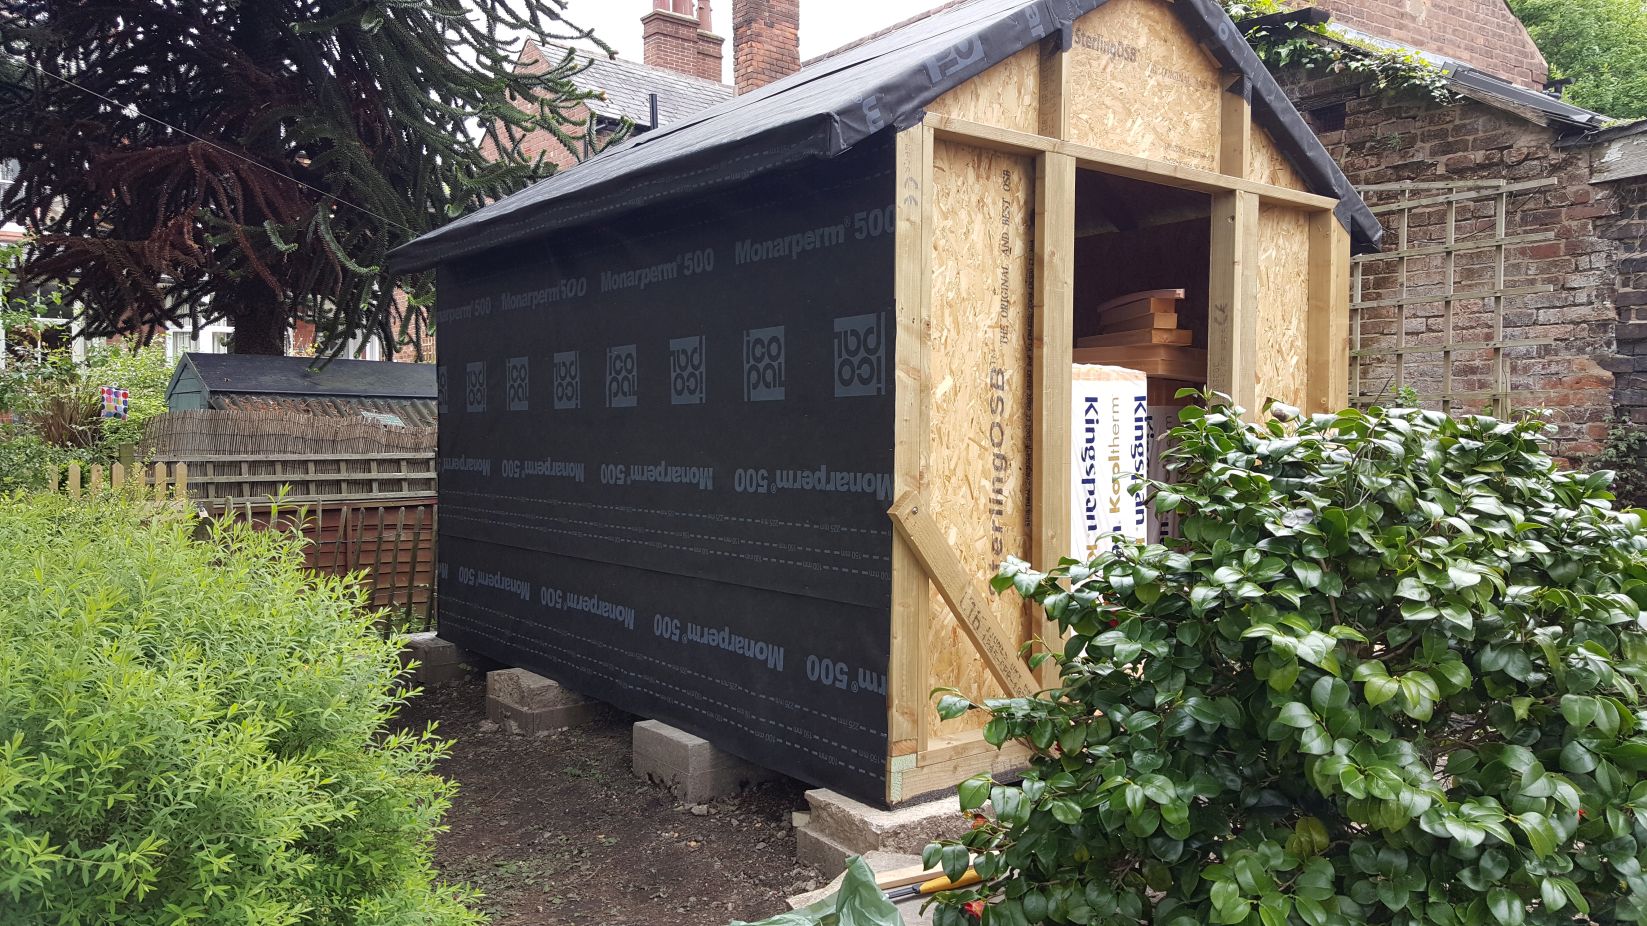
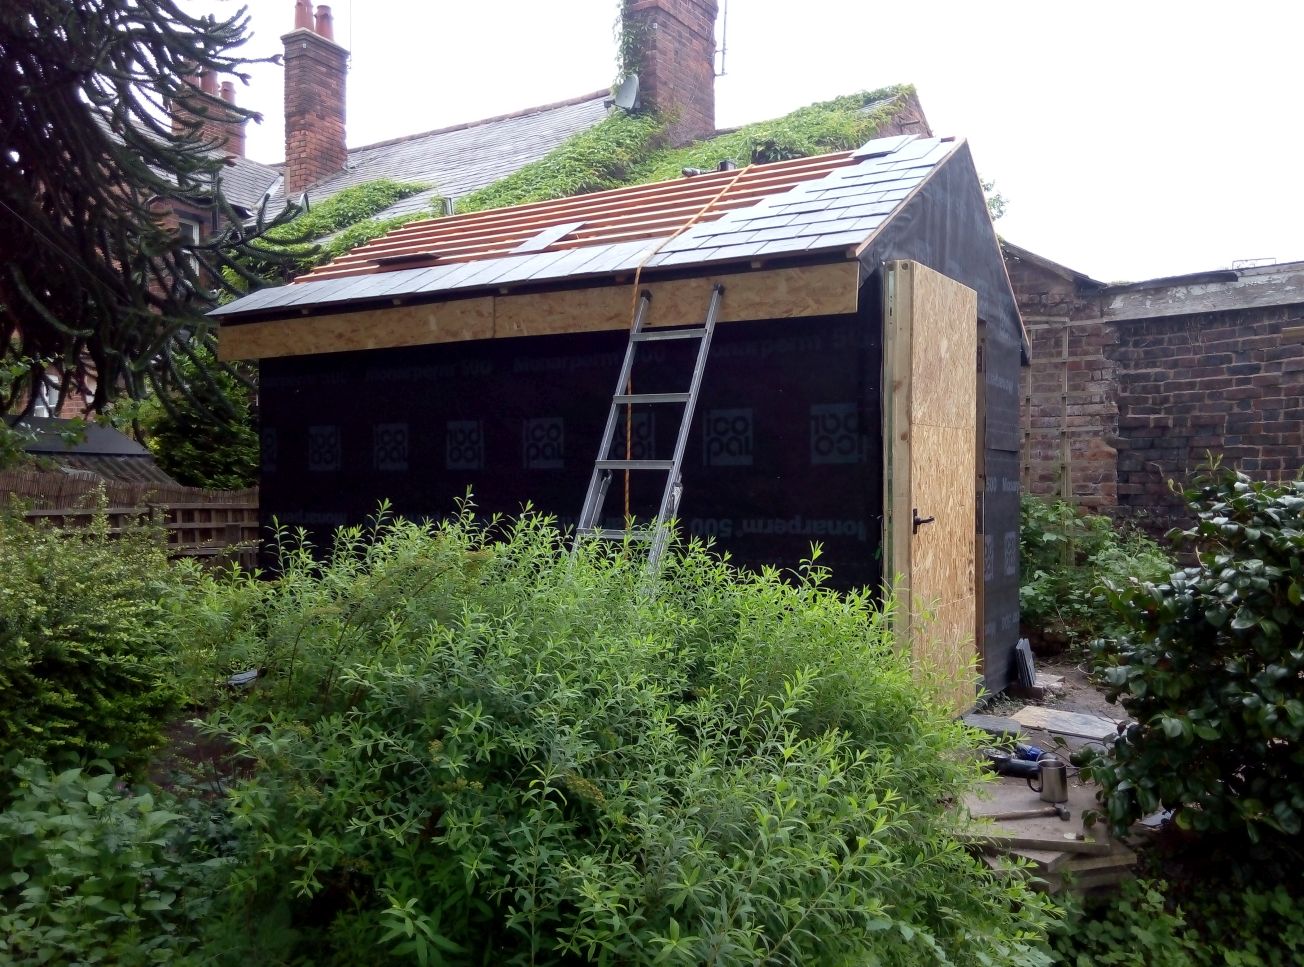
A photo showing the sheeting taking place: The roof sheeting is already on (know as 'sarking' in Scotland and required by Scottish building regulations, not required by building reg. in England but I wanted a solid roof to work from later and it gave us something to fix the temporary roofing to. We fitted some temporary bracing to the frame to keep things stiff while the sheeting was fixed. Off cuts of OSB were used to provide a temporary floor to work from. In hindsight it would have been better to insulate the floor and put the proper flooring down as I spent a lot of time trying to find things I'd dropped under the bits of OSB and moving pieces of OSB around to where the ladder feet needed them to be. Next time...

Getting more shed like.
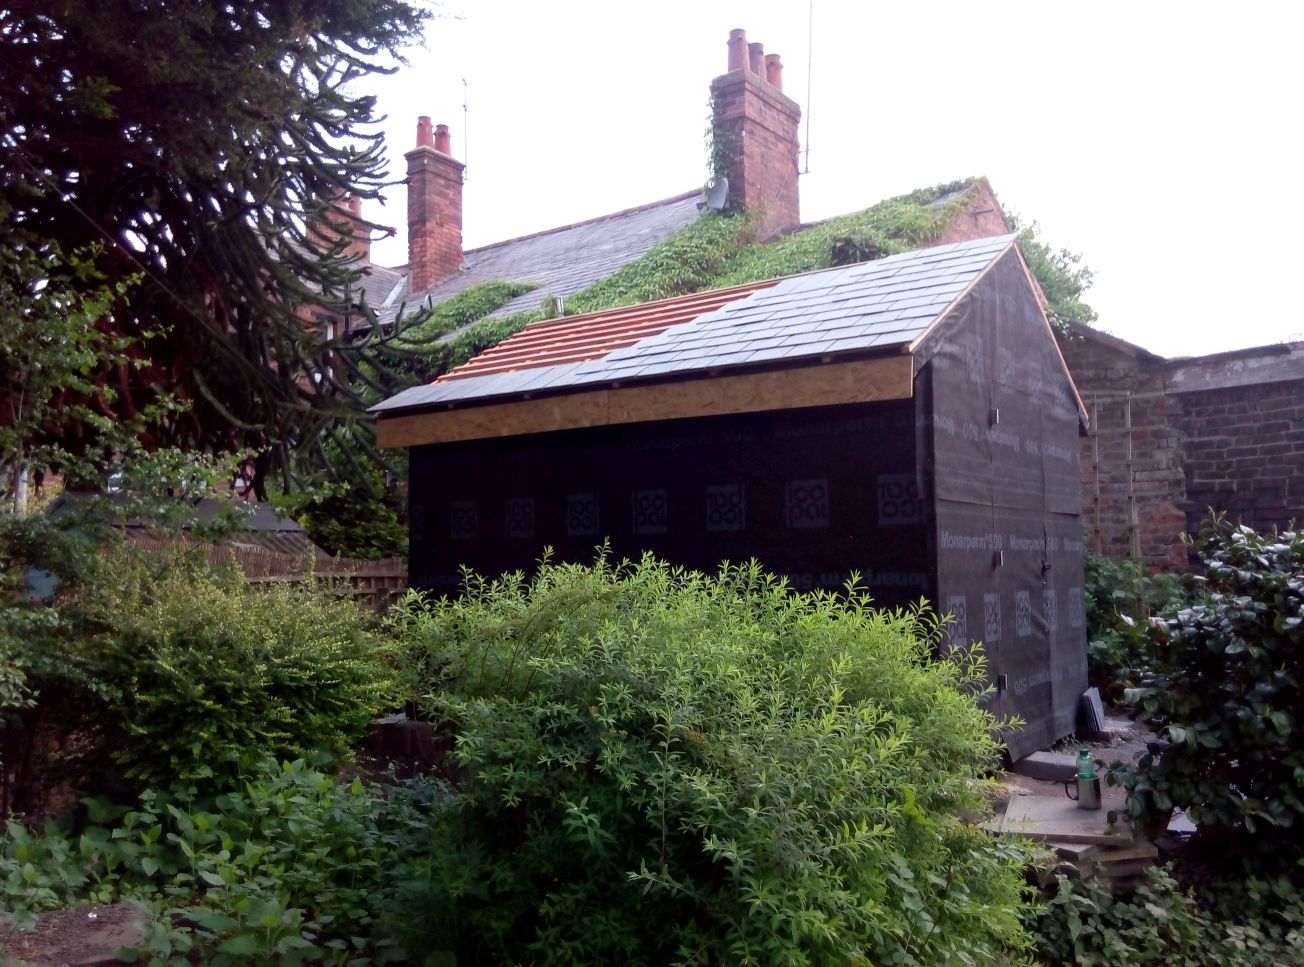
Ends in place and the sun is shining.
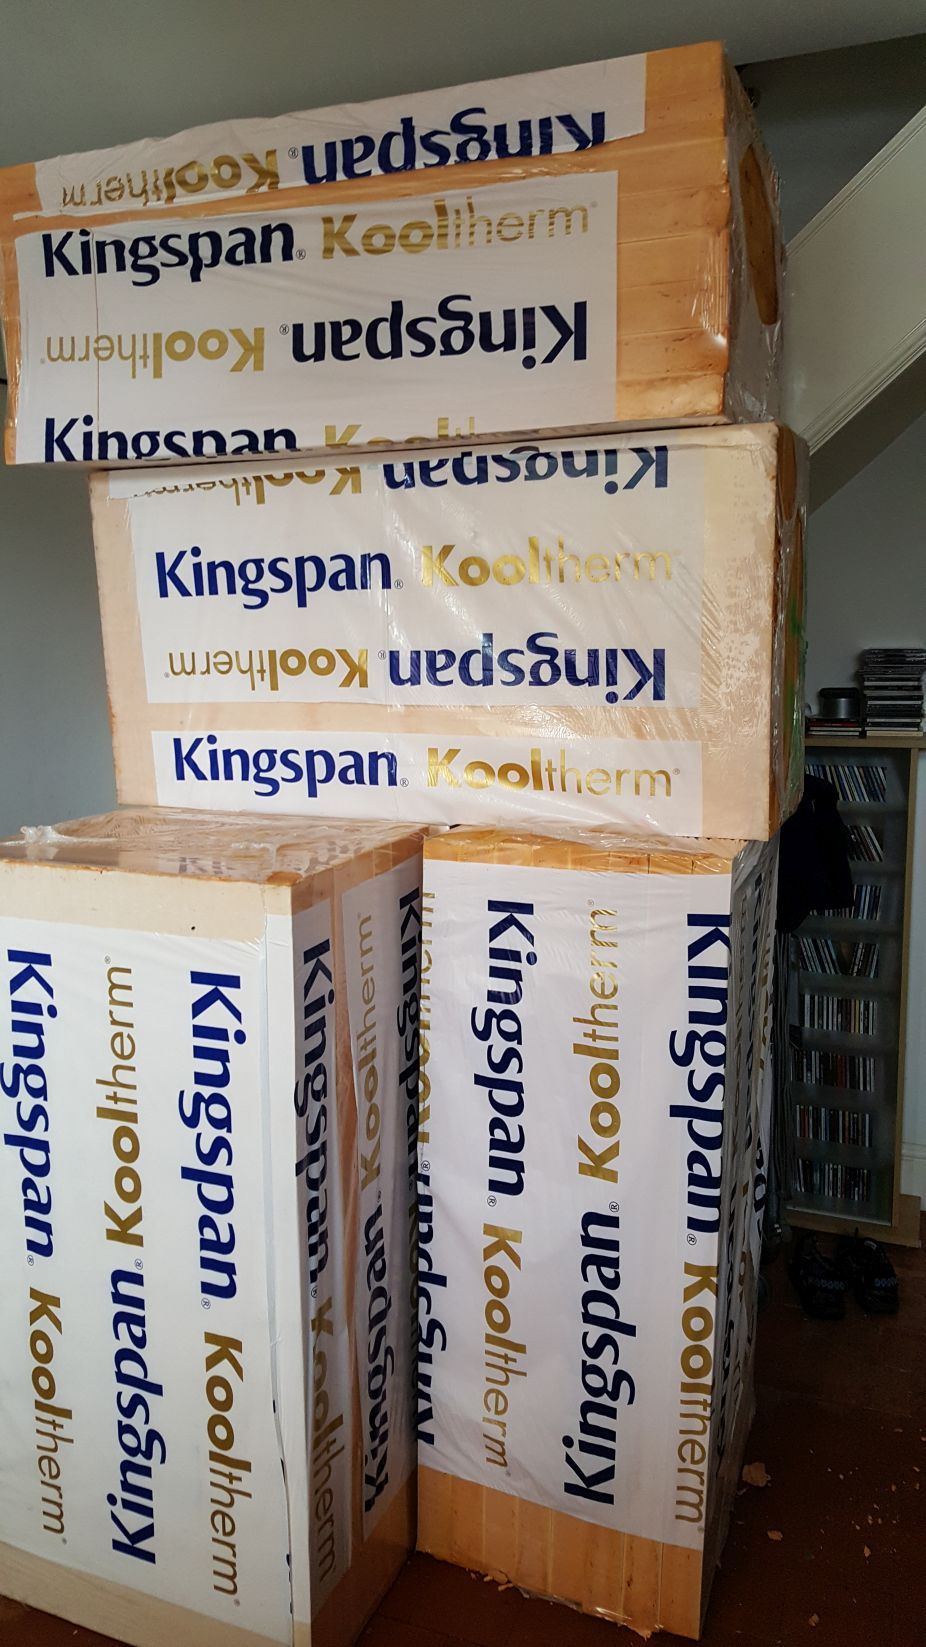
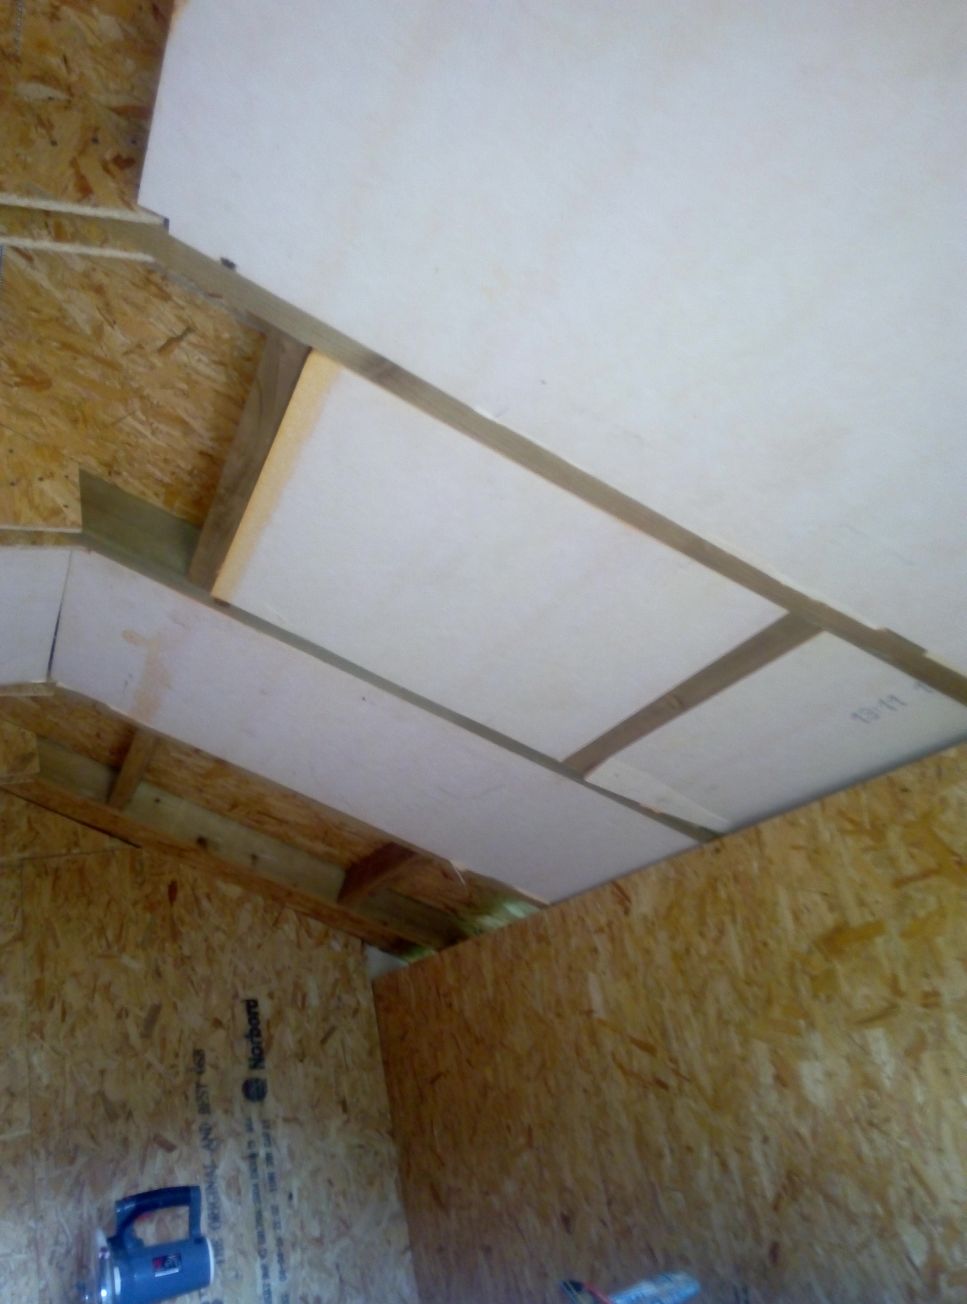
The shed design includes 50mm of phenolic insulation in the walls, floor and roof. This will mean that not only will the shed be easy to heat in the winter but it won't get too hot in the summer either.
The insulation being fitted. The spacing of the studs was selected to match the width of the insulation boards so that we could fit the majority of the insulation without having to cut it. Attention to detail is required when fitting the insulation: care needs to be taken to avoid small gaps as these will cause disproportionate amounts of heat loss.
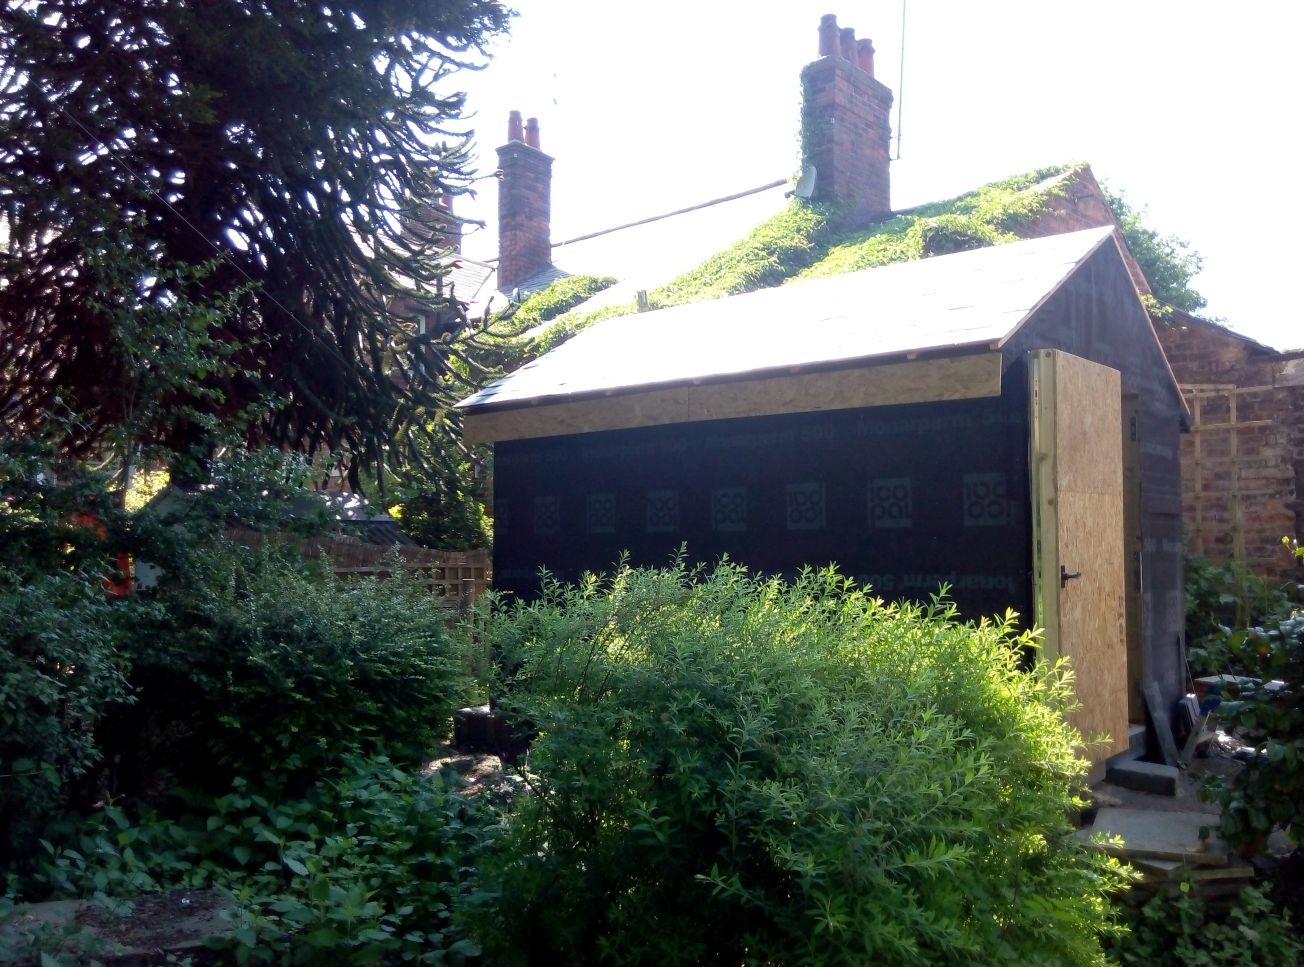
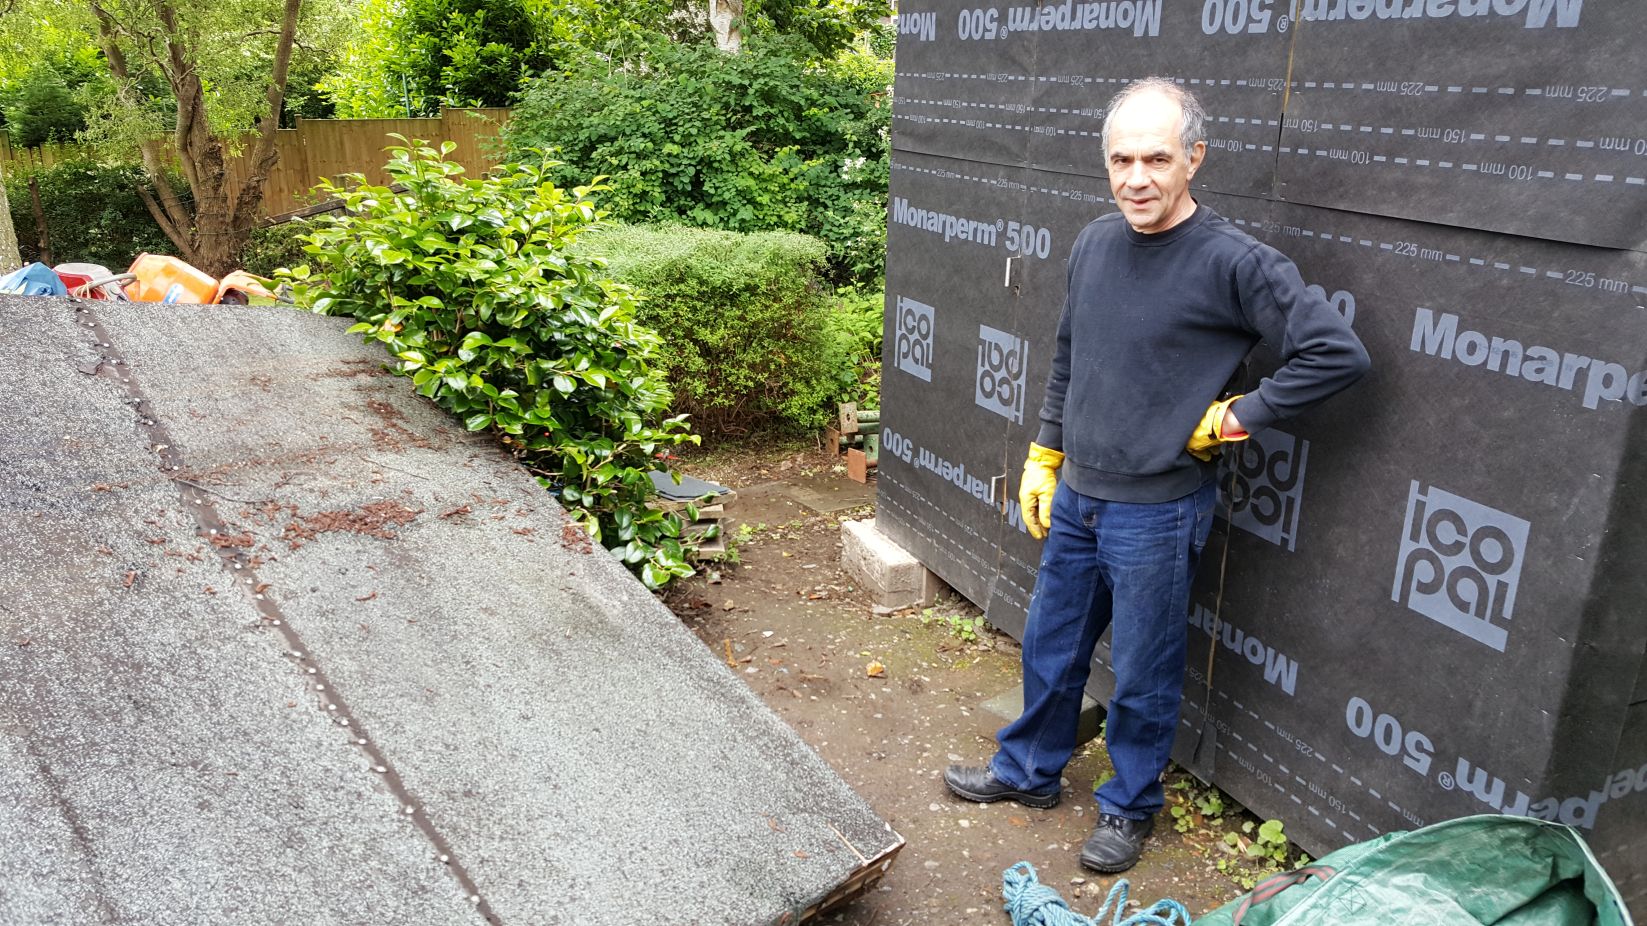
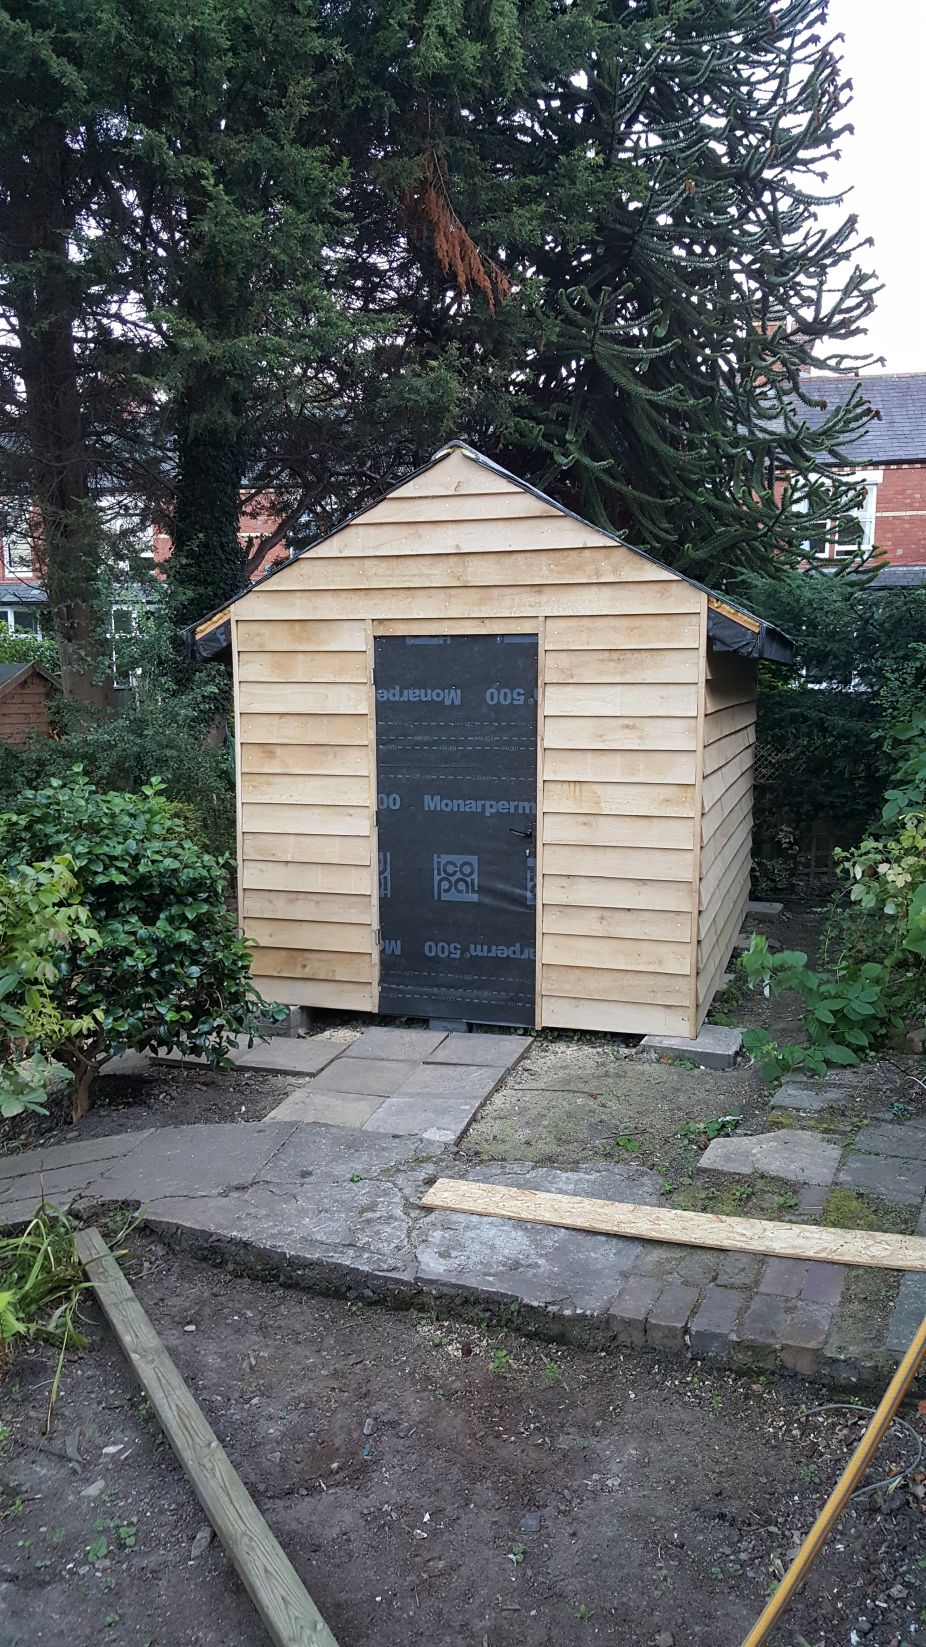
In this picture you can also see that we have sheeted the roof with a breathable membrane. This is the temporary roof covering and will actually stay in place when the final roof goes on. Its only temporary because it isn't rated for long term exposure to sunlight (the manufacturer says up to three months is OK, well within our timescale)
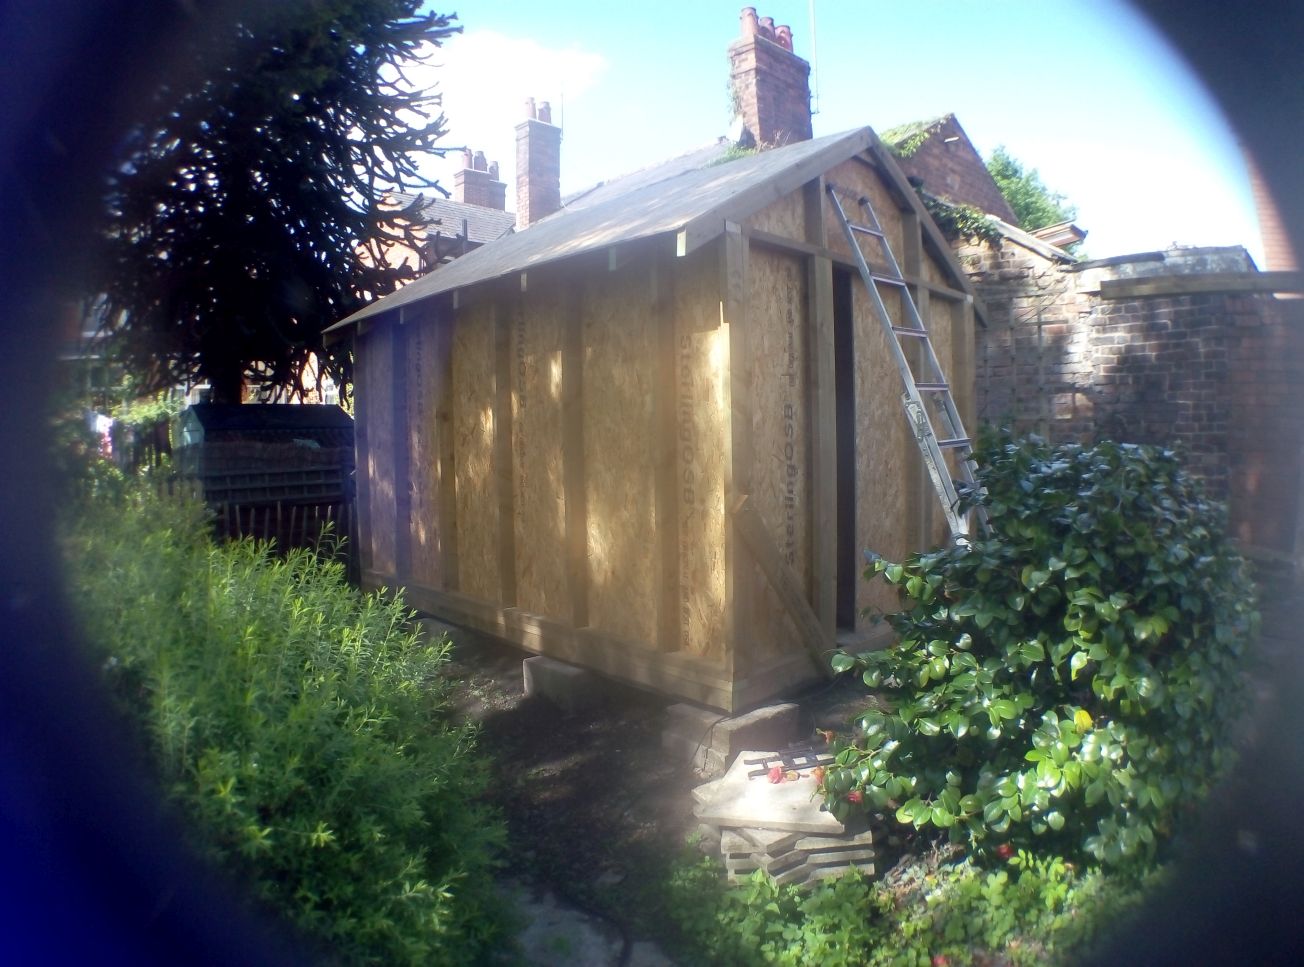
We have also sealed the edge of the OSB at the bottom of the shed with bitumen paint. OSB is pretty water resistant but is prone to swelling at the edges if exposed to water. Once the shed is fully clad the edges won't see the water but in the mean time...
As each section of wall was insulated we applied the breathable membrane to protect the insulation from any weather although mostly we had pretty good weather during this part of the build.
Insulating the underside of the roof.
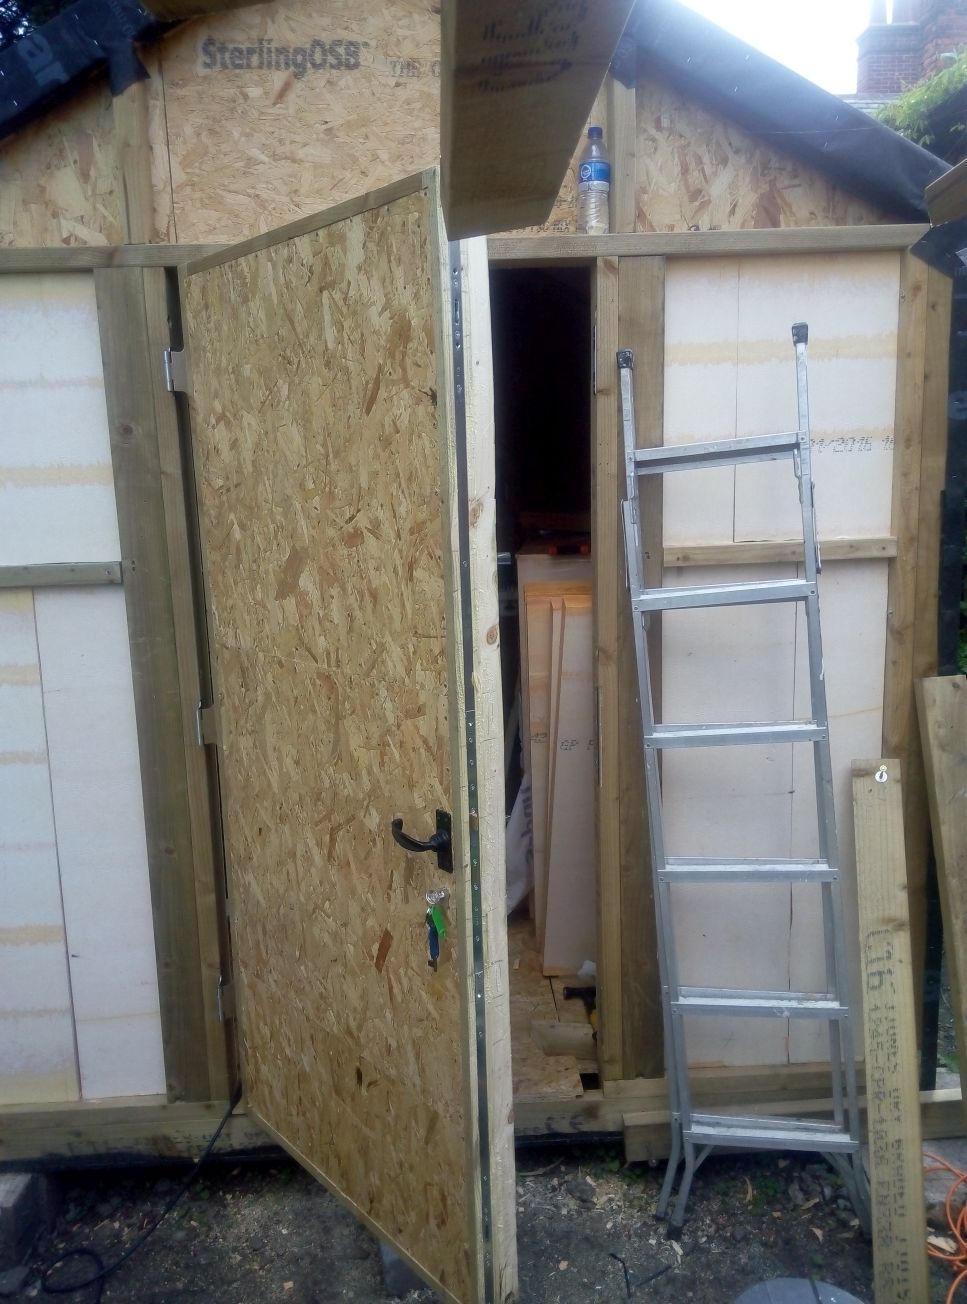
And the ends. Got a lockable door too which meant that tidying tools away at the end of the day became much less of a chore. Put them in the shed, lock the door.
We've fitted a multi-point lacking system to the shed which is nice and operates very smoothly but took far to long to instal. If I was doing this job again I'd probably opt to use a pair of keyed alike mortise locks and have them installed in about a third of the time it took to install this lock.
There are some other security features included in the construction but I'm not going to detail them here.
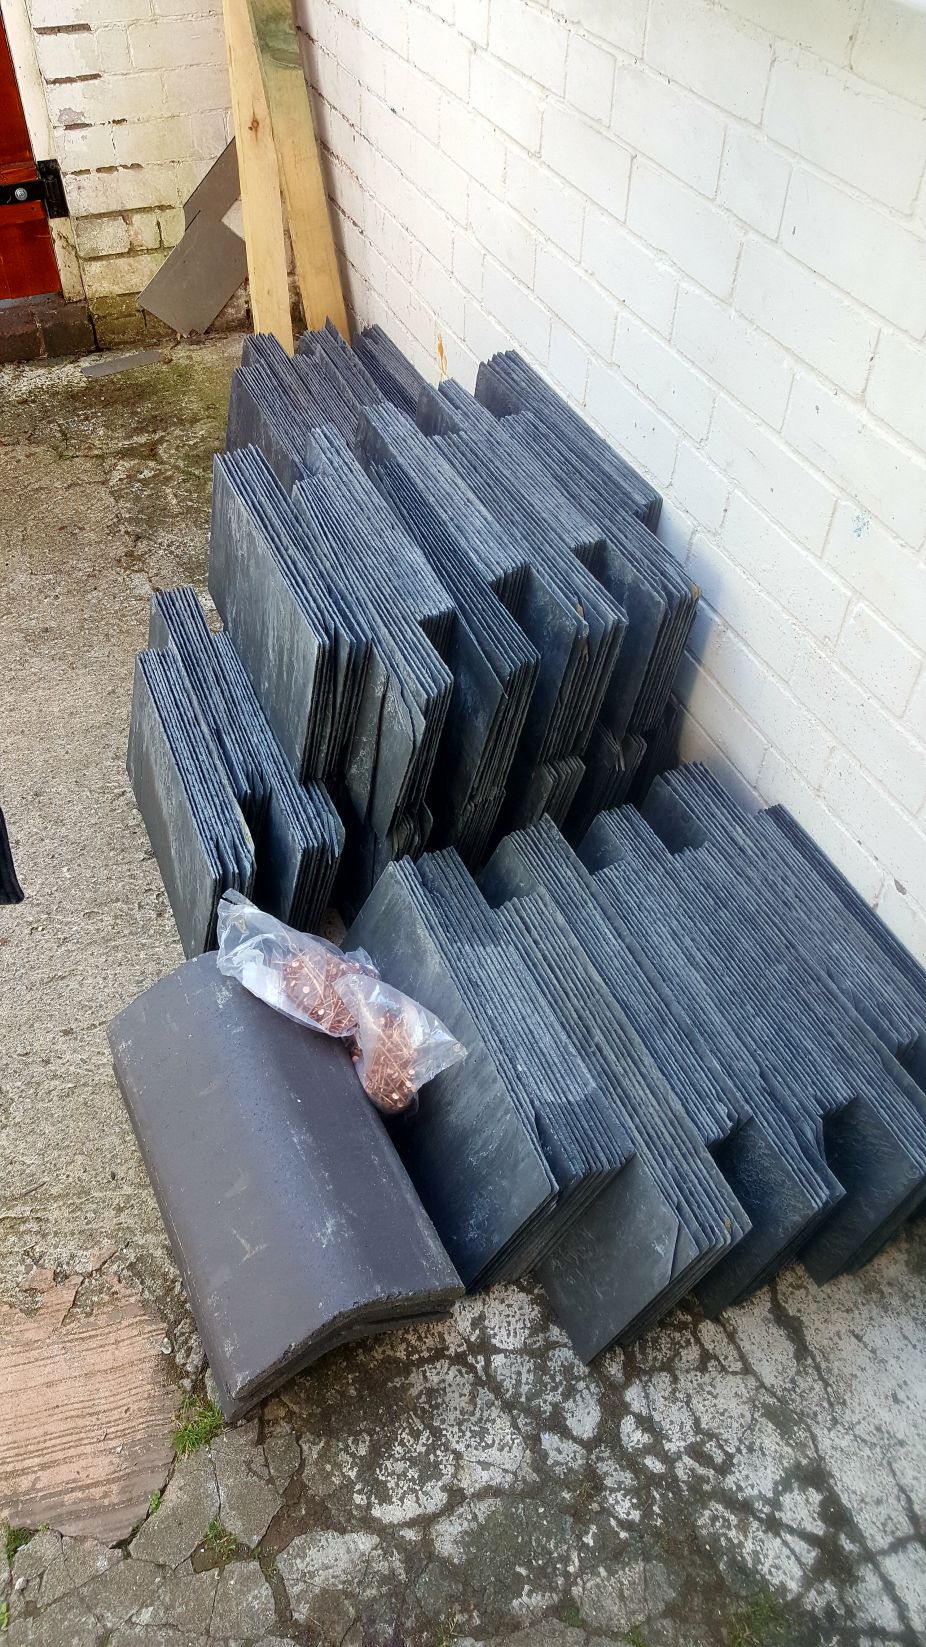
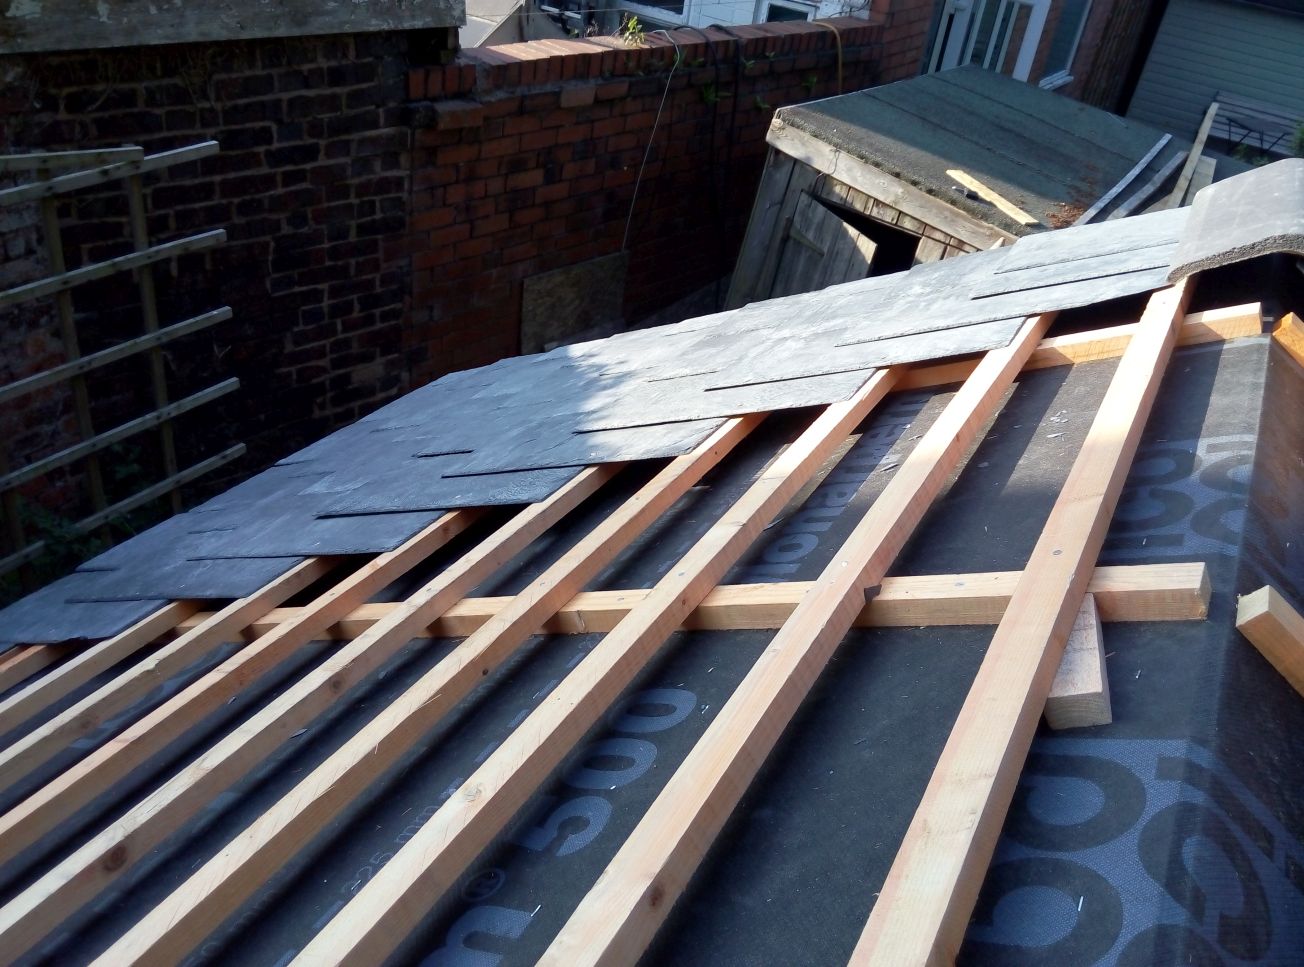
Next came the roof proper: Since the shed isn't planned to be moved anytime soon and because I hate doing jobs more than once I chose to roof the shed in slate. Slate costs but it lasts for generations!
The slate on our house and those around us is well over 100 years old (in the form of a roof, obviously the raw material is probably millions of years old), looks great and works really well. That said, the slate in the photo below cost over £500 (GB). I could possibly have got second hand slate but that would have meant a delay of 2-3 months. Originally I'd wanted to use Welsh slate (the best in the world) but that again would have meant a wait of 3-4 months as supply is limited. This time round I used Spanish slate, good quality but not quite so regular as the best Welsh slate.
Note, also, the bags of Copper slate nails. These are the best choice for fixing the slates as they will not corrode like a steel nail.
Old slate rooves usually only fail for two reasons apart from direct, impact damage. Either the wooden battens that the slates are fixed to rot or, more commonly, 'Nail Sickness' sets in.
Nail Sickness is used to describe the situation where the nails begin to fail due to corrosion and slates begin to slip leading to loss of 'Head Lap', holes in the roof and slates falling completely off the roof.
Generally, when a few slates are seen to have slipped, it is time to consider having the slates stripped, the old battens removed and new roofing membrane and battens fitted. In most cases the original slates can be refitted with just a few replacements to take care of any cracked or broken slates.
(update 2024) This is the process that we're currently going through on the roof of the main house. I noticed that some of the slates had slipped and that there was evidence of previous 'quick repairs' using metal clips (called 'Tingels') and the mortar pointing on the ridge tiles was failing. I called in a professional Roofing Contractor and he advised removal and rerfitting of the slates. Our roof is around 120 years old so I guess it's time it had some love!
I'm really lucky in that I have a local roofing supplier who is knowledgeable and experienced and doesn't mind me asking dumb questions. The other customers who come in whilst I'm asking the dumb questions are all roofing pros and also add helpful hints and are happy to lay out a few slates to demonstrate what they mean. Generally I think Roofers are a pretty friendly bunch where I live.
One tip I learned was that of grading the slates by thickness as there can be a significant difference between the slates in a batch. You can grade them with a gauge but after a bit of handling you get to feel the weight of each slate and grade it accordingly. Grading should be done into a minimum of five thicknesses and the heaviest slates fitted in the lower rows. The grading used to be done on site by the 'boy' (trainee) and it gives you a good feel for the materials. It also allows you quickly tap each slate with a knuckle to 'ring' it for cracks. A dull sound indicates a slate with a crack though it, these are put to one side for the pieces where a piece of slate is required. Slates with the top corners damaged can still be used as the top of the slate is covered by the two slates above. Slates with damaged bottom corners can still be used as half slates where one side will be cut off anyway.
I've read several book on roofing and slating and spent time laying things out to figure out some of the terms used like 'head lap'.
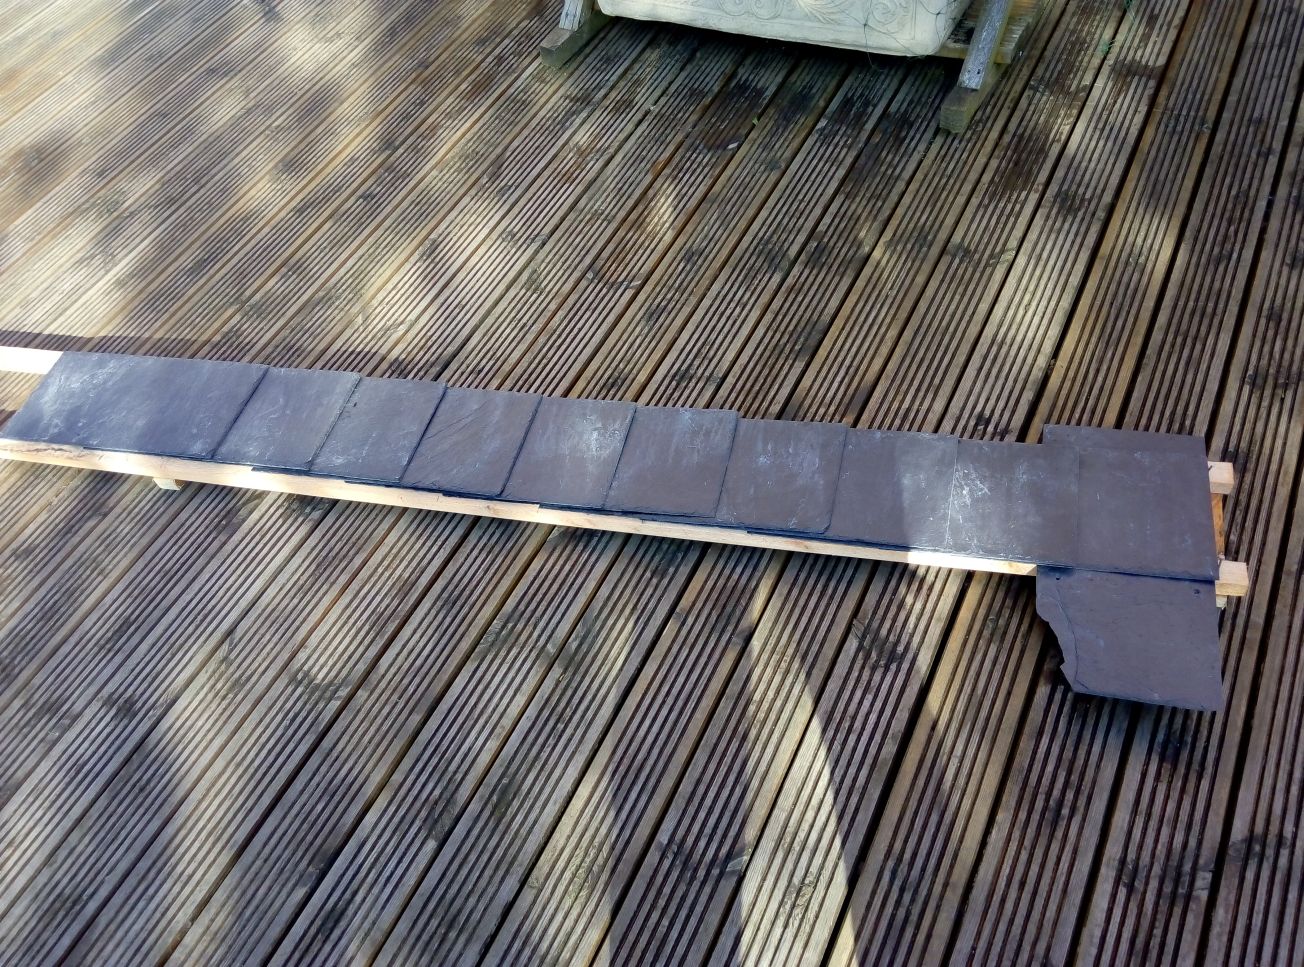
Here's me laying out the slates to check my calculation and to get a feel for what I'm going to be doing on the roof:
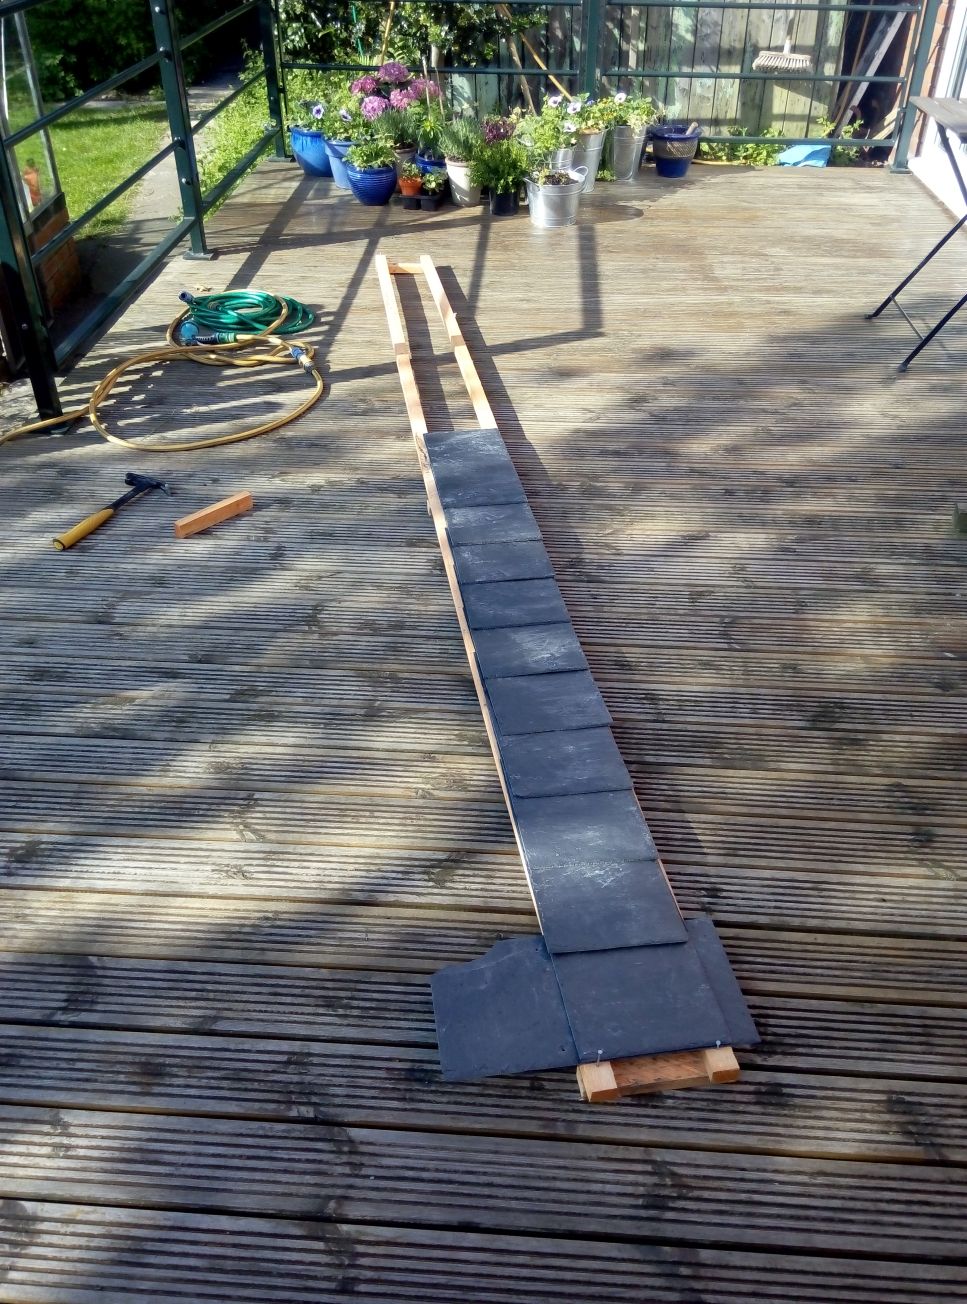
This was done so that I could check out the spacing I'd calculated between the courses of slates: you have to fit the roofing battens at the right spacing for the slates to be nailed to.
This measurement was then used to set the battens out on the roof:
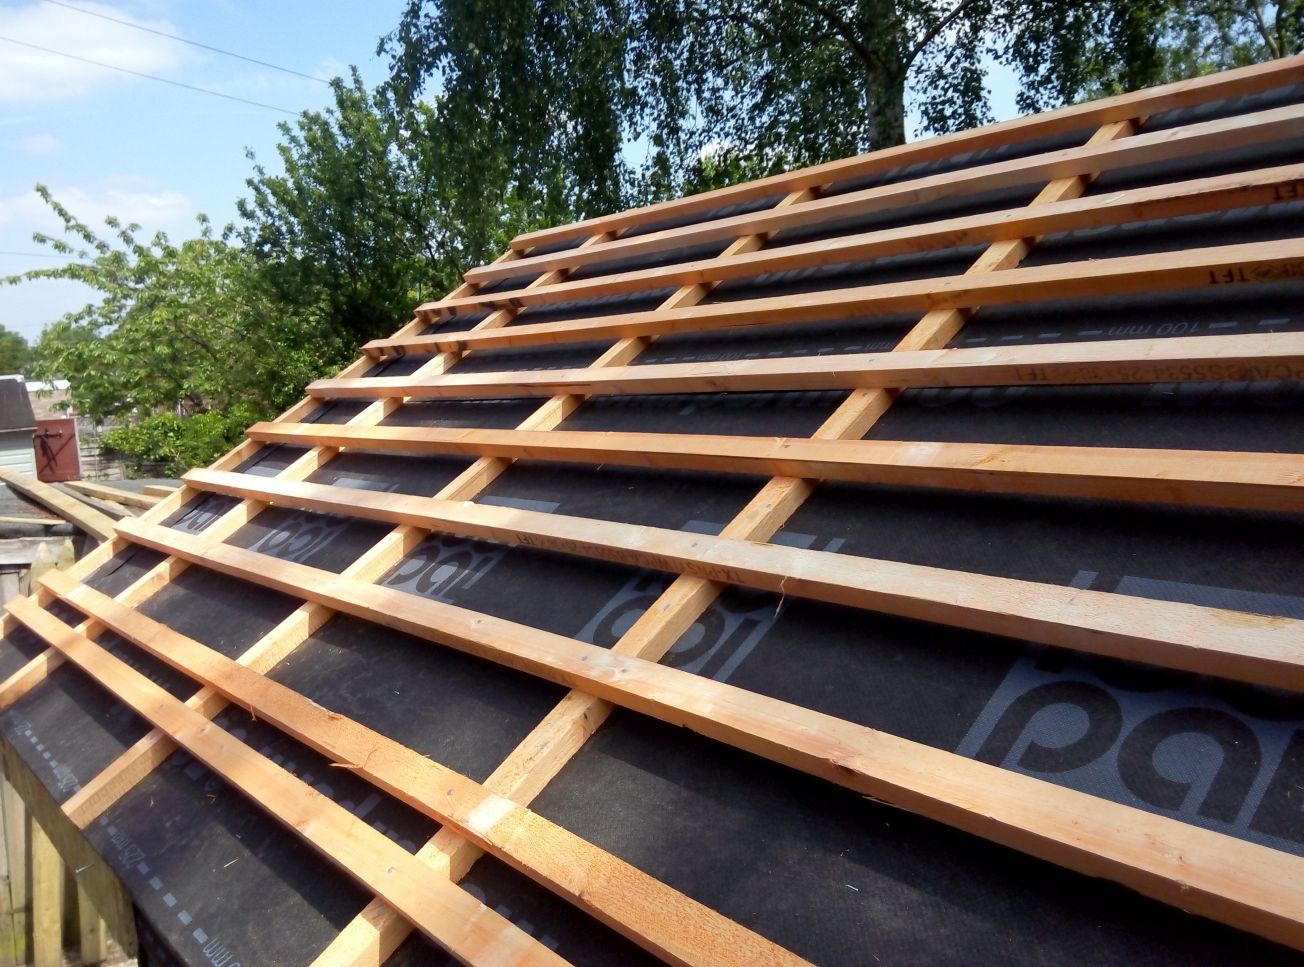
The extra batten at the bottom is to support the first row of slates which are fitted on their long edge to fill the gaps between the row above. The very outside edge of the slates is supported by the fascia boards which haven't been fitted yet in this picture. Note also the sunny weather; this did not last, most of the slating was done in the pouring rain although the bursts of sunshine in between were hot enough to make the roof (and me) steam.
Sitting on the back of the car at the local builders merchants waiting for the rain to stop so we could load up some thin ply for lining the shed roof.
Slating well under way. The rope is the static line for my safety harness, a bit of overkill for this job but I can't afford to be off work injured and it means I can concentrate on what I'm doing. If Id thought about it I'd have had a scaffold put up around the shed as it would have made the whole job easier and would have saved me having to keep going up and down the ladder to get materials. Next time...
End of day one slating. Not fast but it looks good.
Side one complete.
Side two started.

Getting there. The murderous looking hammer is a Slater's hammer. The pick end is used to tap holes in the slates for the nails (I bought mine pre-holed but you still need to make holes on the cut slates) the pick is used to tap repeatedly on the back of the slate until a piece 'spalls' off the front of the slate. The spalling leaves a shallow crater which the nail head fits in and leaves the head flush with the surface of the slate.
The hammer head end of the hammer is machined with criss-cross cuts that look a bit like a steak tenderiser and serve to grip the head of the copper roofing nails as they are driven in. The small head means that there is less chance of hitting the slate and the surface of the head means that the hammer doesn't slide of the nail head as you hit it. That said, I miss hit one or two nails and had to use the third feature, a nail pulling claw on the side of the head to pull the nails out as I replaced the now broken slate.

All Done. The bit I missed in the laying out of the roof (and I didn't see it mentioned in the text book until I read it again) was that I should have had the longer course of slates at the bottom of the roof where it is less easy to see but it doesn't detract from the weather tightness of the roof. Given that this was my first slate roof I'm pretty pleased with how it's all worked out.
There was a few weeks delay while I earned some more money and researched the exterior covering of the walls of the shed.
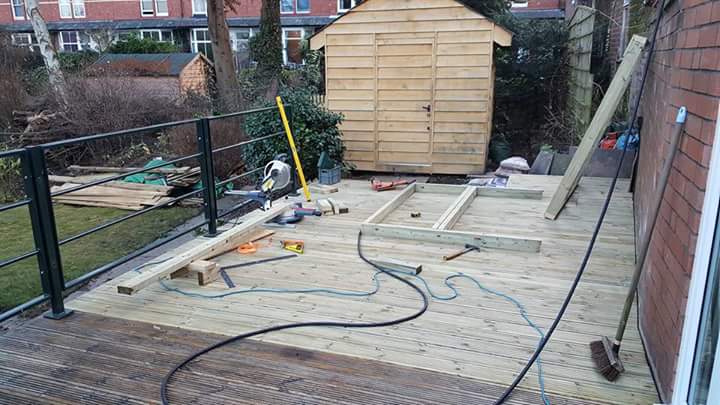
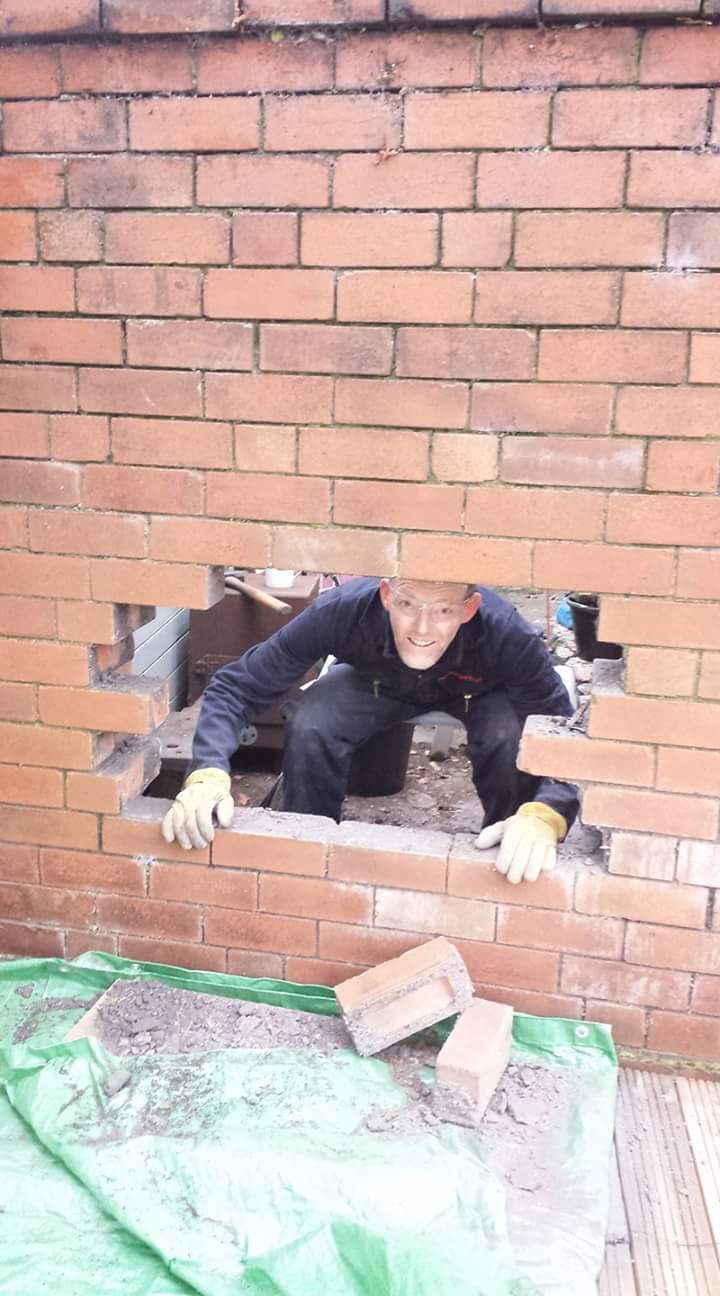
We also took down the old shed. Friend Nige came up from Sussex and between the two of us we demolished the old shed and levelled the site. The site is where the original brick built shed I'd planned on was going to go but the management has decreed that the deck shall be extended and have a washing line facility and a new log store.
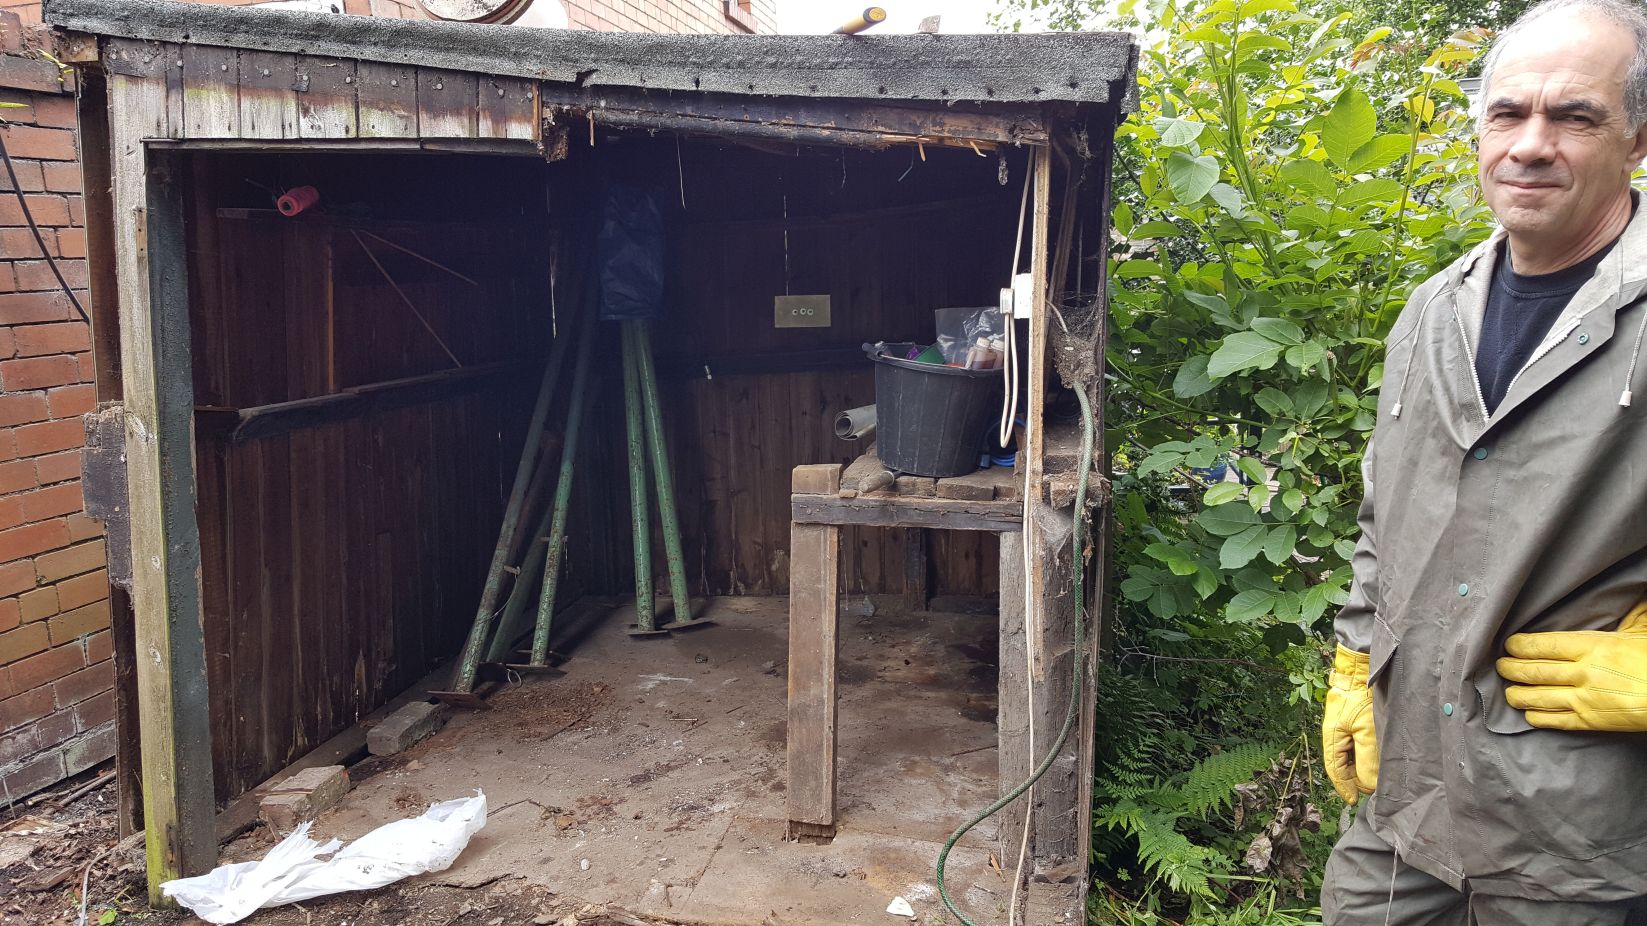
At this point the only thing holding this up was force of habit and the Acro props leaning against the back wall of the shed.
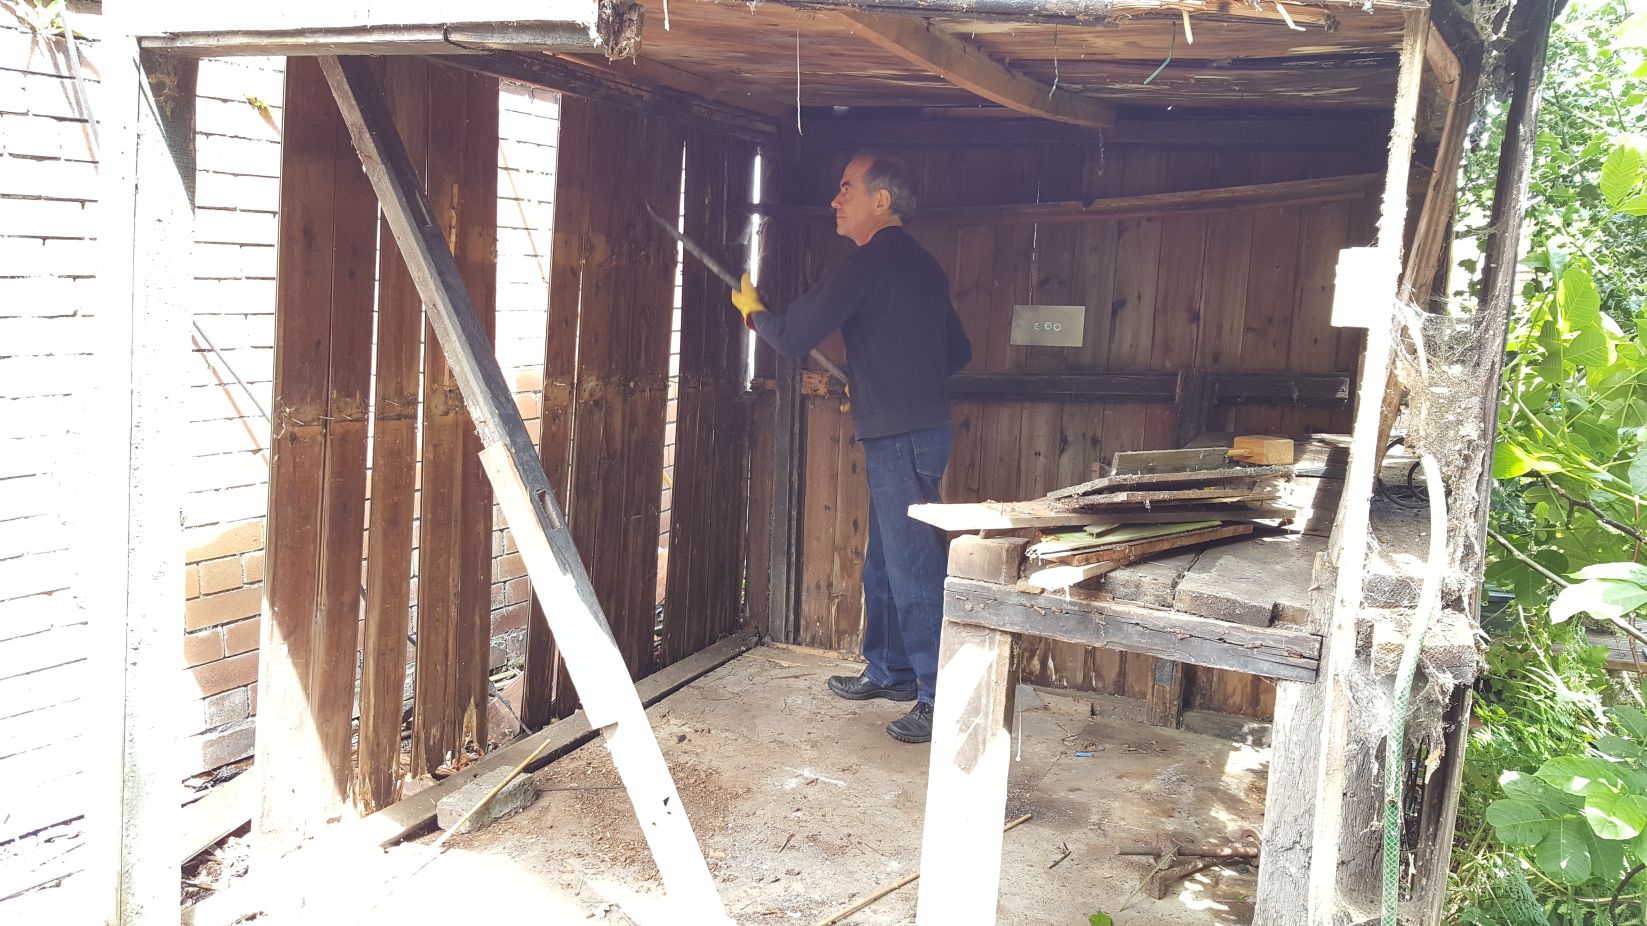
Who gave him that pry bar?
Shed down, just waiting for me to make the roof piece small enough to move.

Yep, chainsaw wins again!
Site dug out and all sign of the old shed gone.
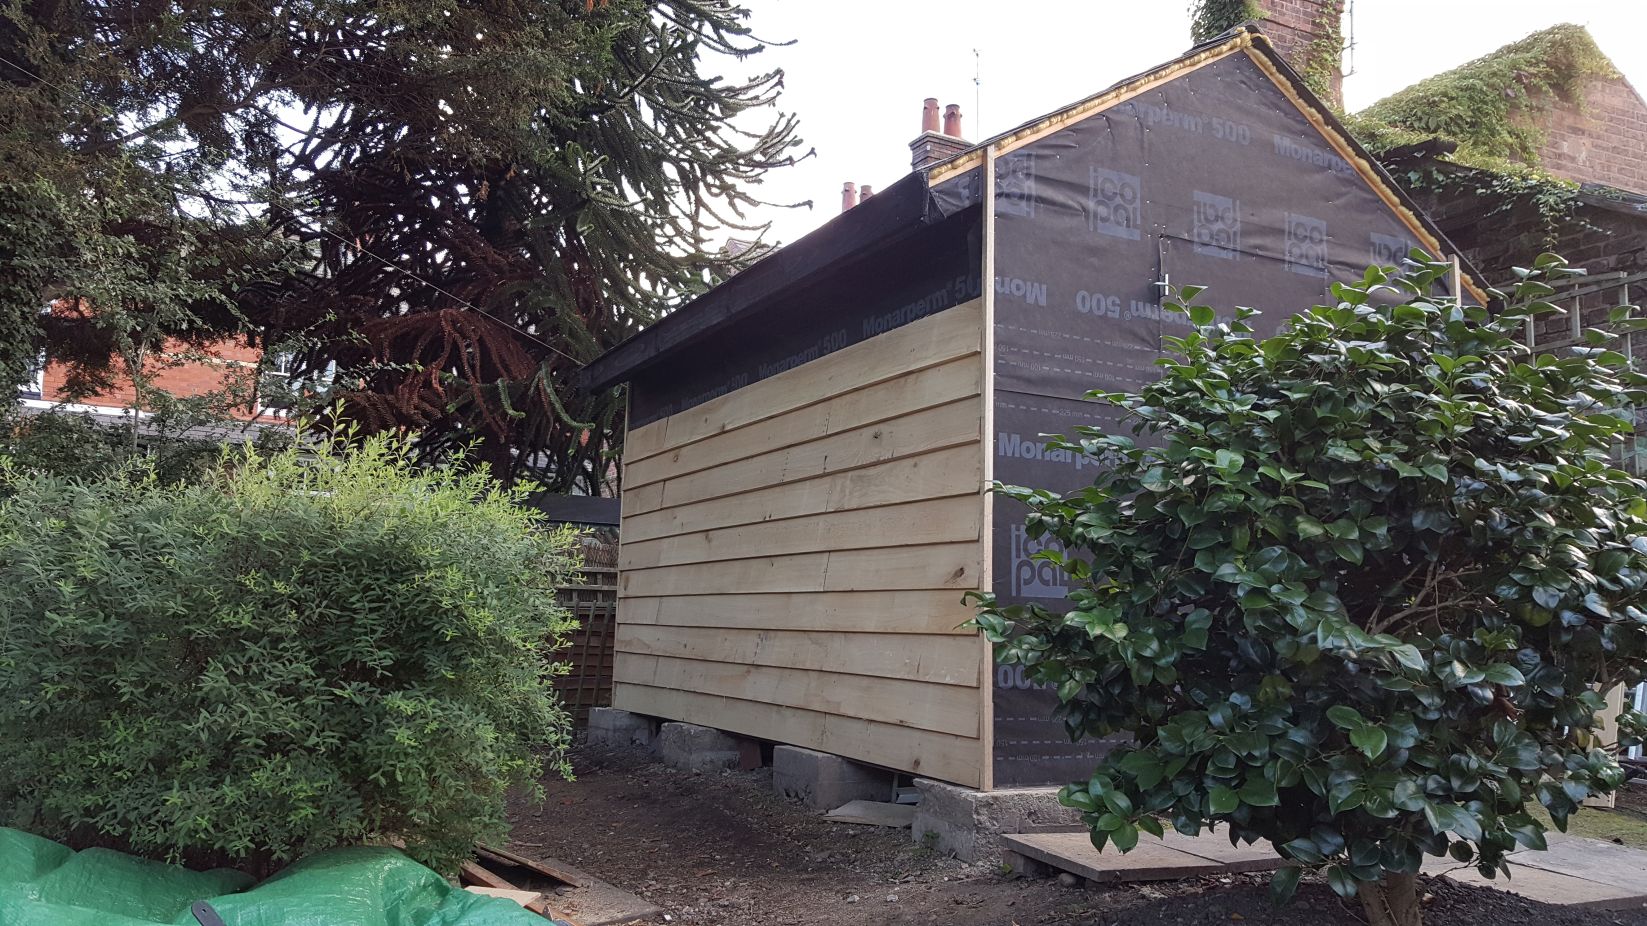
I had looked at few options, treated softwood, Siberian Larch (as good as a hardwood if you believe the web sites), Green Oak, and composite materials (Marley Eternit wall planks)
Nobody near to me wanted to quote for the Marley or indeed any other manufacturer's composite materials but a web search showed the prices to be very high and the product life expectancy not to be any where near as good as the price would suggest.
Softwood was out on the basis of the need to treat it in some way or other and to keep retreating it every few years. The British grown softwoods are particularly poor quality and should be avoided at all costs if you are going to be keeping the building.
Green Oak, though relatively expensive, actually comes out very well in terms of life expectancy, looks and the complete lack of any need to treat it with anything. The tannins in the Oak are a natural timber preservative (though care needs to be taken to avoid killing off anything green where the initial water run off will land or to prevent marking of any fine surface such as concrete or stone paving as the Tannins will stain, permanently.)
The stack below cost around £750 (GBP)
Fixings for the green Oak need to be either galvanised or stainless steel as the acids in the Green Oak will rot plain steel very quickly forming iron salts that stain the wood permanently black.
I used heavy weight stainless steel ring nails. You need to size the nails for the weight of each board as you are only supposed to put one nail per width of board. If two nails are used at each purlin there is a very real risk of splitting the board as it shrinks with drying.
I used an overlap of around 40mm, more than the manufacturer recommended but too much is not a problem too little is. One point to note; measure from the thick edge of the board as the widths vary slightly and if you don't measure from the exposed edge you'll end up with uneven spacing. I made up a pair of stepped spacer blocks which I used a couple of plaster board props to hold up. The board edge was placed on top of the space block and spacing maintained whilst the nails were driven home.
Nail holes should be pre-drilled and slightly larger than the nail. The wood is green and needs a little bit of movement room although the movement lengthways is very small. The shrinkage across the grain is larger hence the need to use only one nail at each purlin.
Here's how it looks installed:
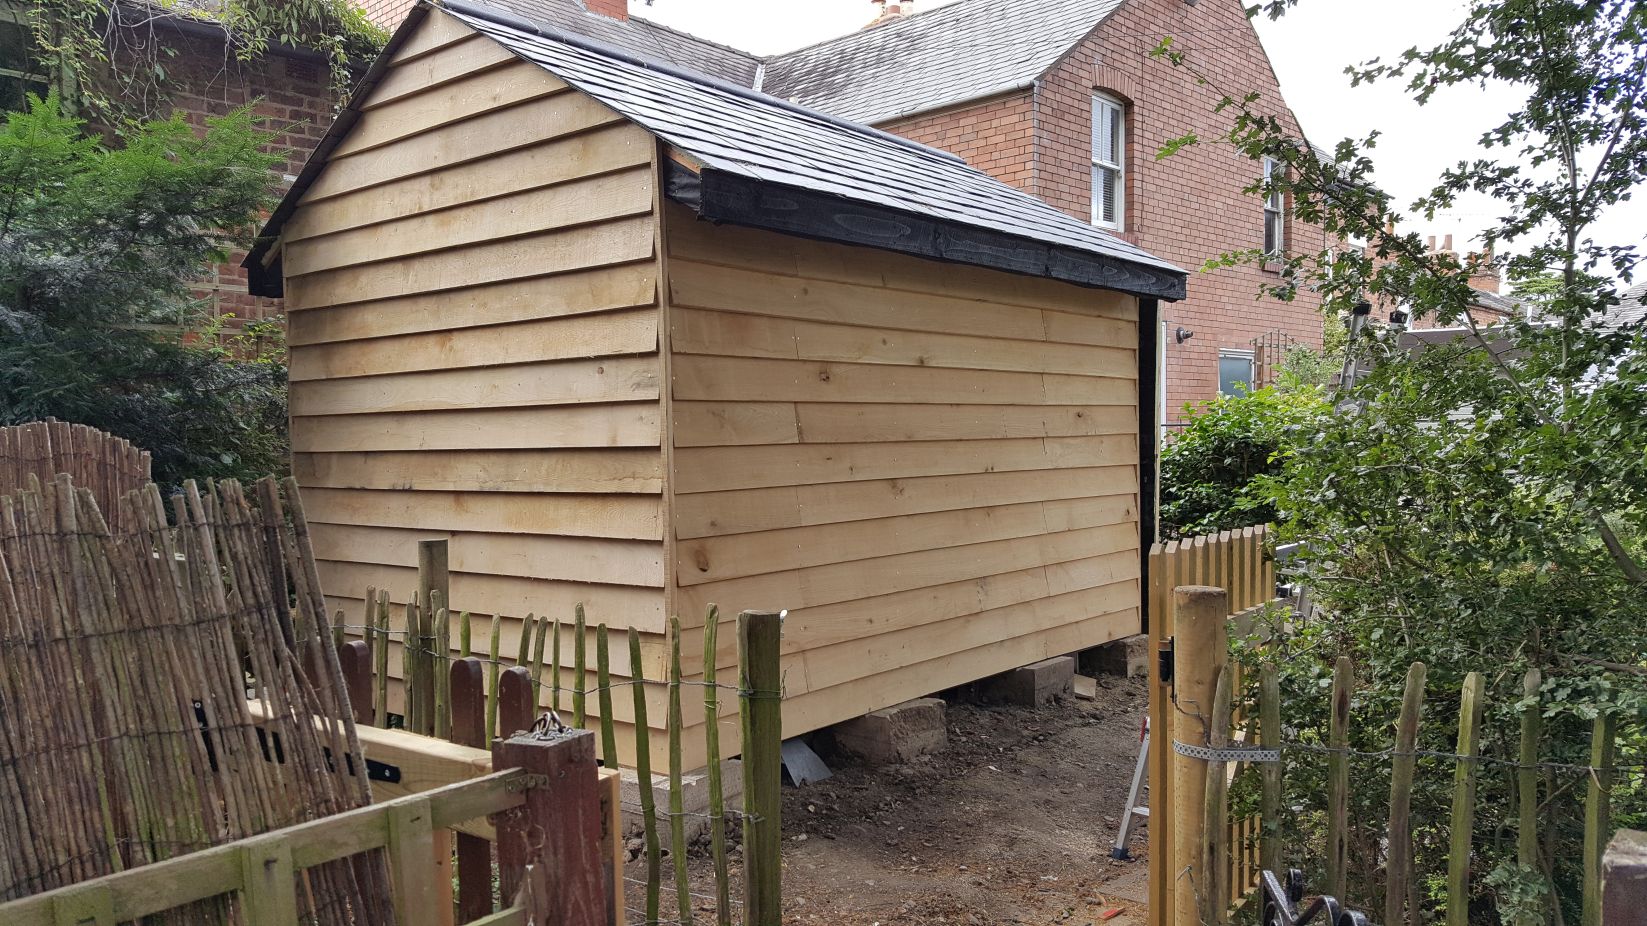
There was more cladding to fit, namely the pieces at the ends of the eaves and the door covering but I don't have a picture to hand of that at this point. There are a few more pictures below where the final end view can be seen.
The deck extension was completed next: This was another late autumn / Christmas project.
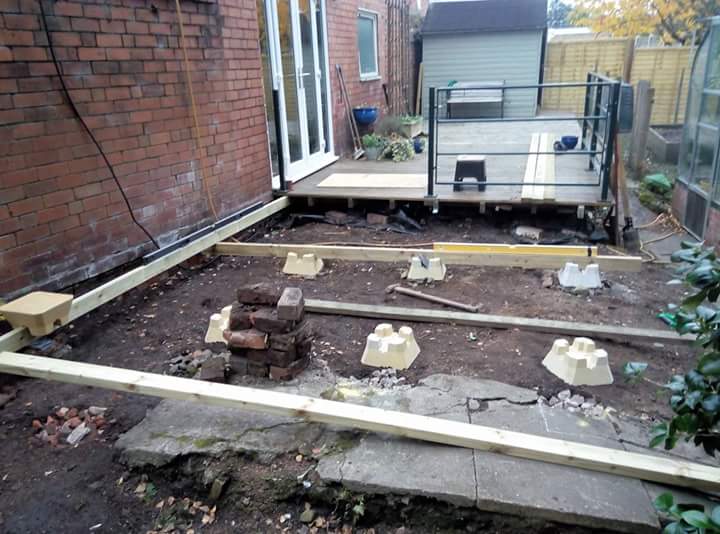
Using a slightly different approach than was used for the original deck I've opted to use these concrete deck blocks to support the wooden framework for the deck.
Each one sits on top of a three foot deep column of crushed, compacted rubble. Each block is carefully levelled and the wooden structure built on top of this. The sub-stucture is identical to that used in my deck project (see here) and a weed proof, permeable membrane has been fitted before putting the sub-structure down.

More deck boards from the same source as the main deck so easy to build with.
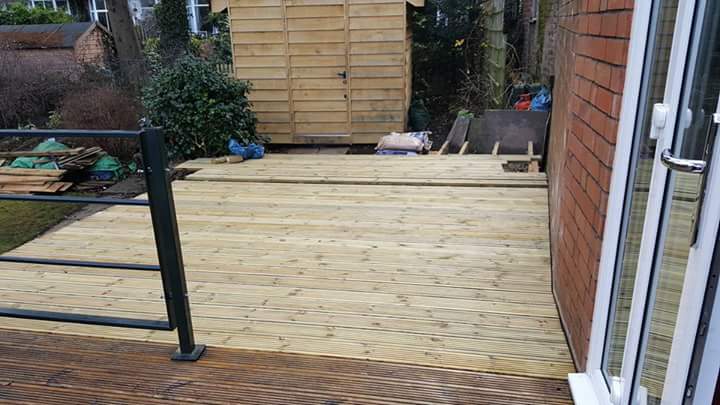
End of day one, much faster progress on this deck as I knew what I was doing this time.
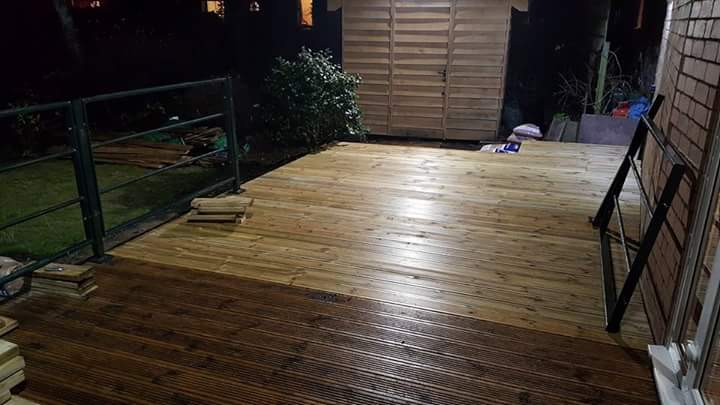
End of day two (a long day this time!)
Framing for the log shed begins. Chop saw and nail gun mean that this is a rapid build.
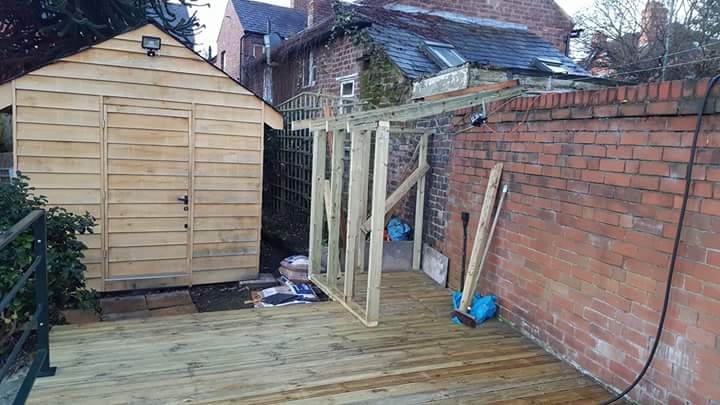
Framing continues.
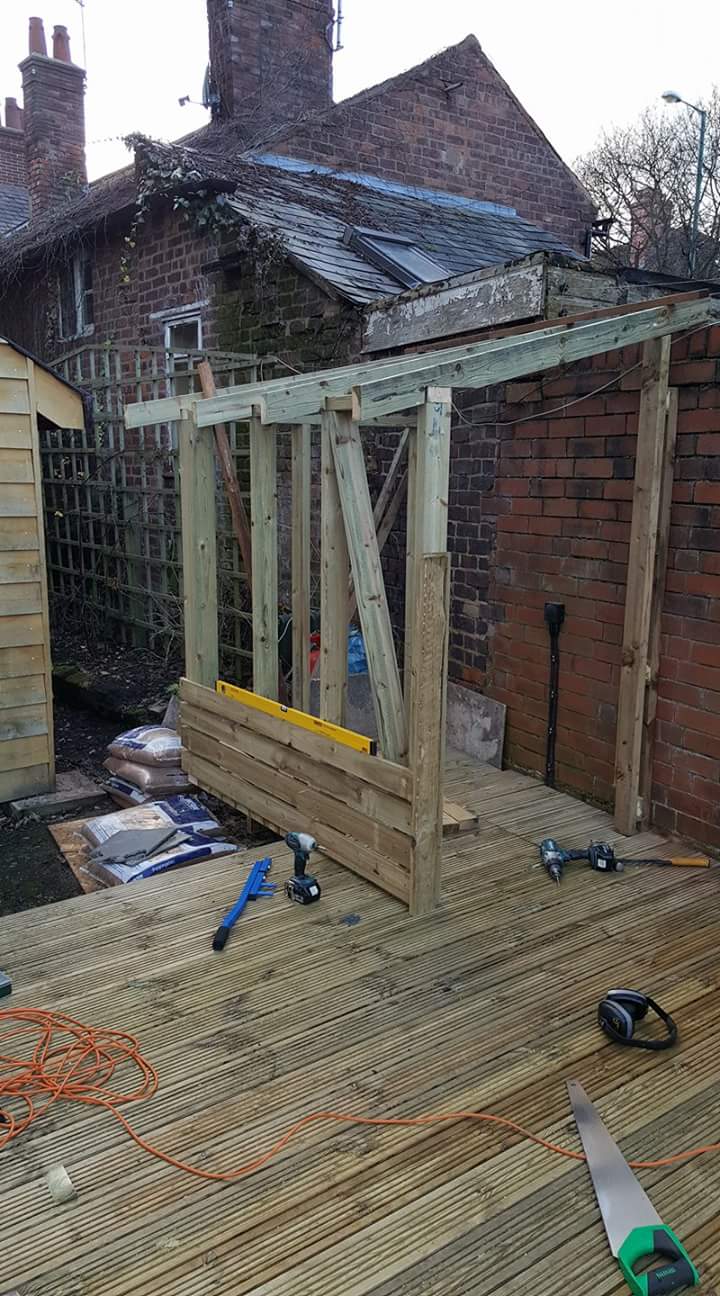
Starting to clad the sides. I'm using a hit and miss boarding on this shed as it is designed to store firewood and I want it dry but draughty to aid seasoning. The boards on the inside of the shed will overlap the gaps in the boards on the outside of the shed stopping rain coming in but allowing the wind free access. This is a pretty draughty location here too, despite beign up against the yard wall.
The Blue tool next to the Makita driver is a board straightener and is one of the reasons why I was able to get the new deck boards down so quickly. It is used to pull the boards together and has an over centre action so it hold the board in place whilst it is fixed.
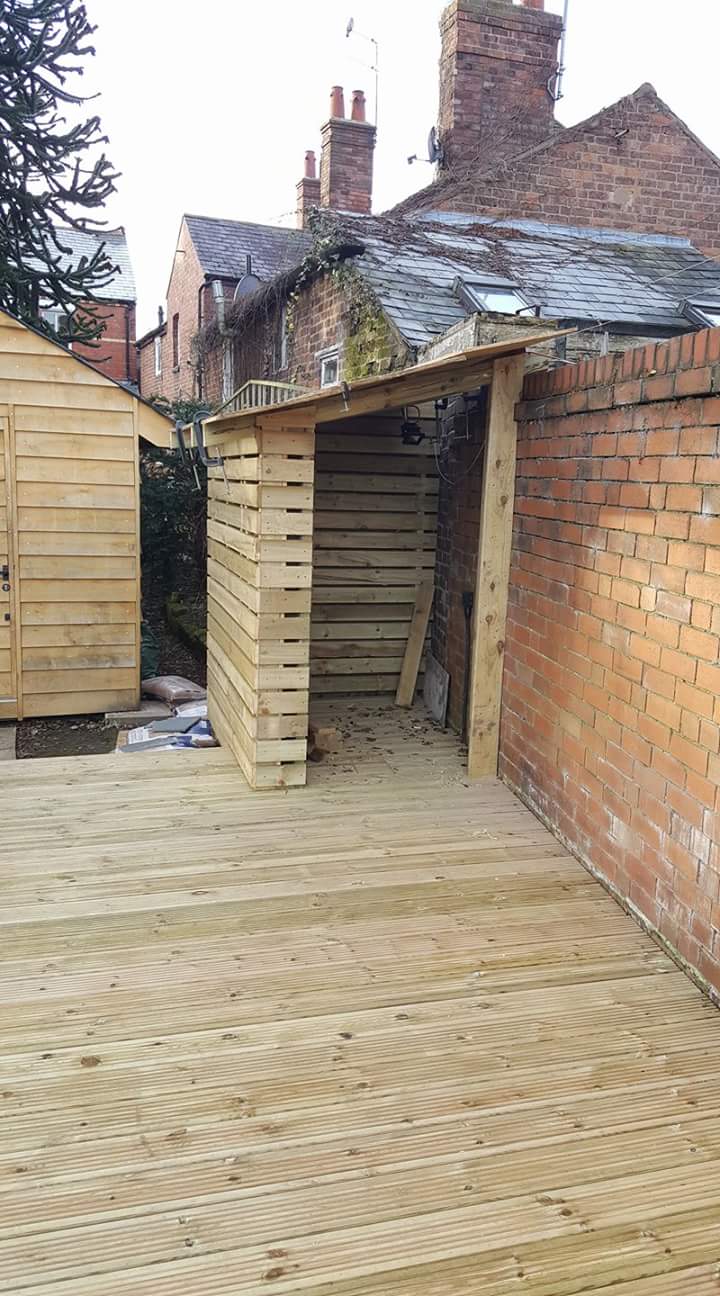
Cladding complete, just need a door and a roof now.
Well, two doors actually! One for the shed and one through from the yard so that we can get the logs through from the road without going through the house.
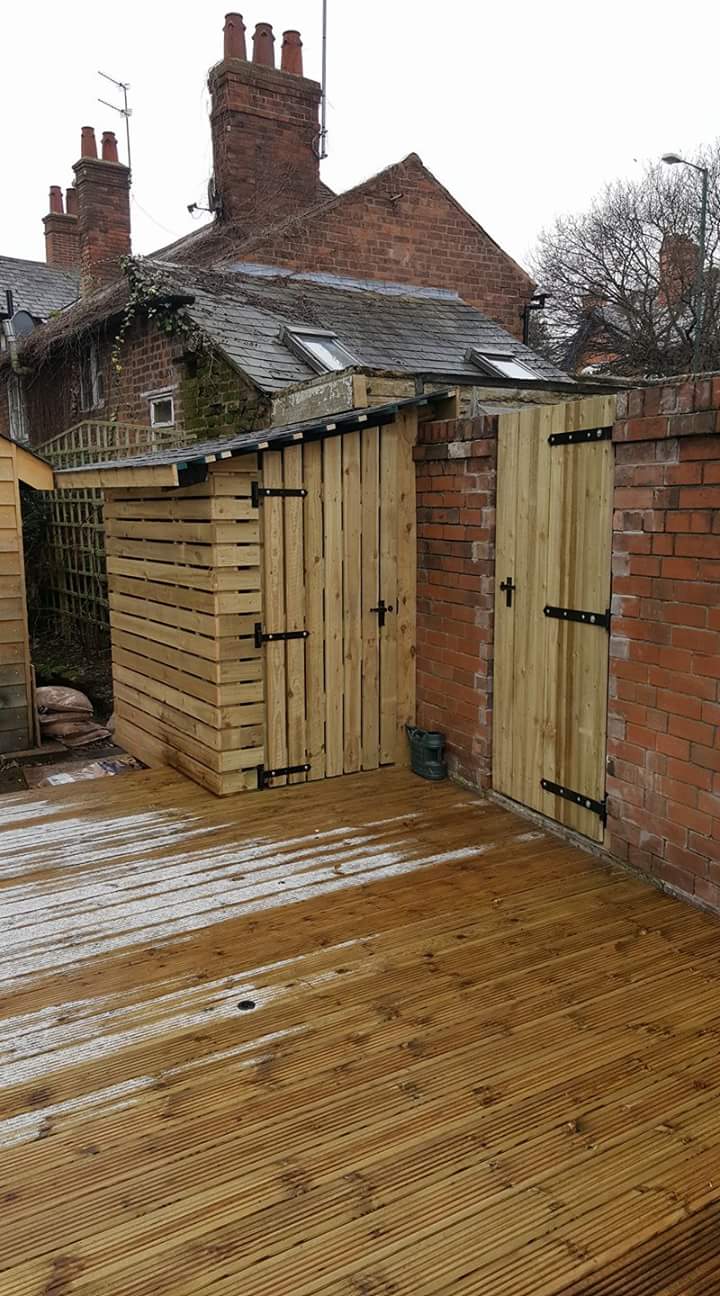
The joys of time-lapse; Reveals quoined (bricklayer speak for making the hole in the wall neat), doors made and hung and slate roof fitted to the log store.
Note also the circular black mark in the middle of the deck; that's the plug covering the hole where the rotary clothes line goes when it isn't too wet / cold to dry things.
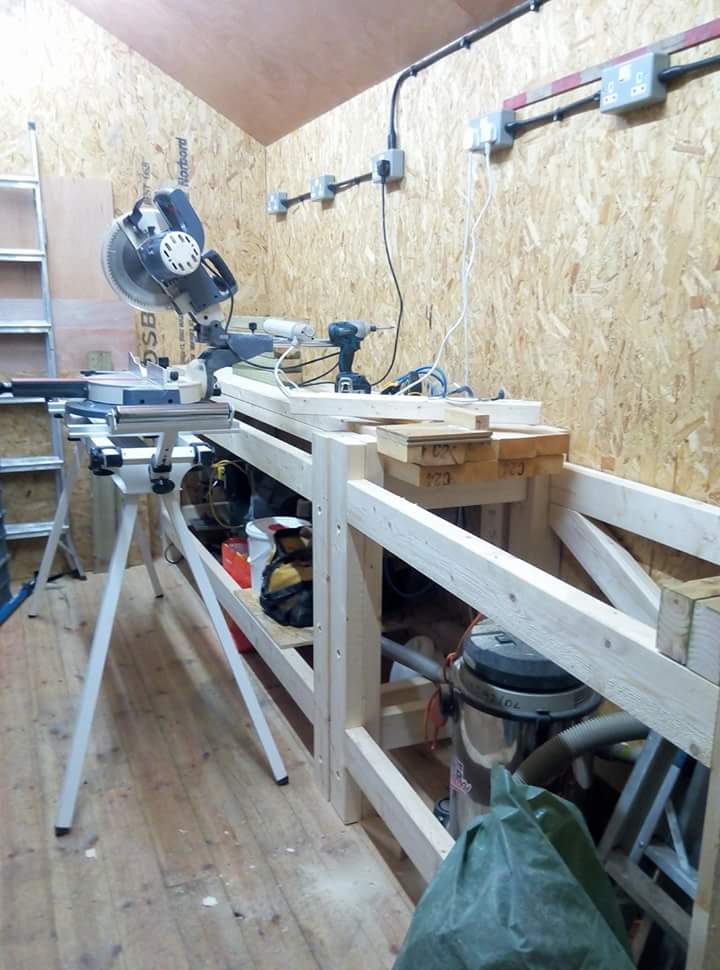
Next job was to make some work benches for the shed. The shed is primarily a work shop and not a 'man cave' and I've long needed a stable work bench on which to repair / make things.
I couldn't see anything that looked good enough or was the right size on the Internet as I wanted a shallow bench that was strong enough and the right height for me to work at so I scratched up a design using my now favourite material, treated 50 by 100 mm studding.
I'm not the greatest wood worker in the world but I know that mortise and tennon joints are what you use if you want strength.
There are two benches, one 2.1 metre long and the other 1.5 metre long. This gives me the option of pulling one out from the wall if I have something wider to work on.
I made up the front, back and end frames and then bolted them together in the shed.
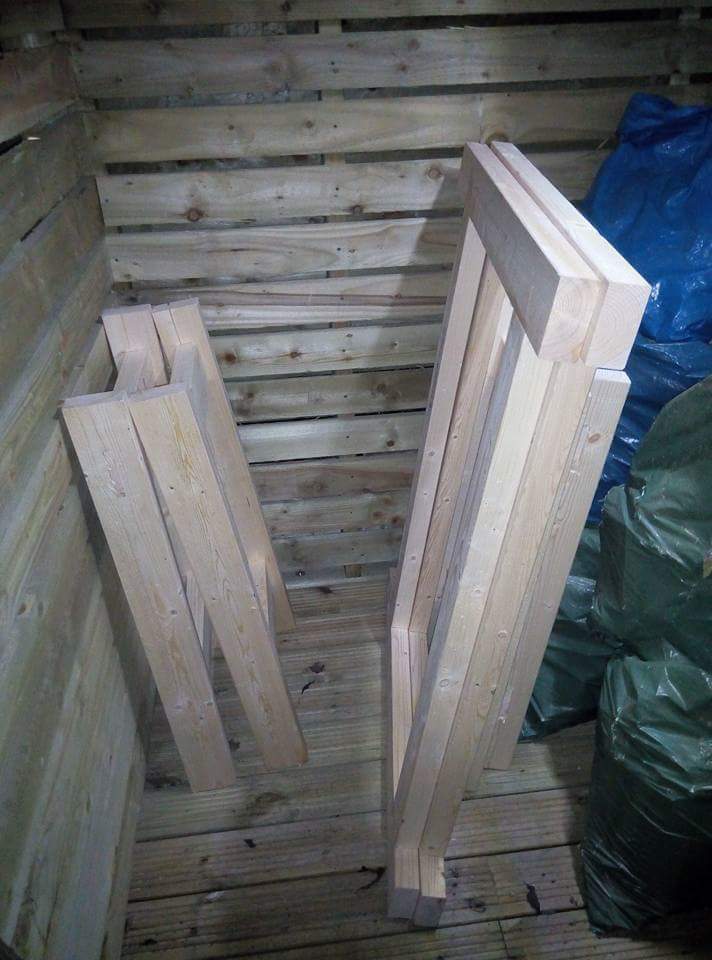
Four ends and the sides for the short bench waiting in the log shed.
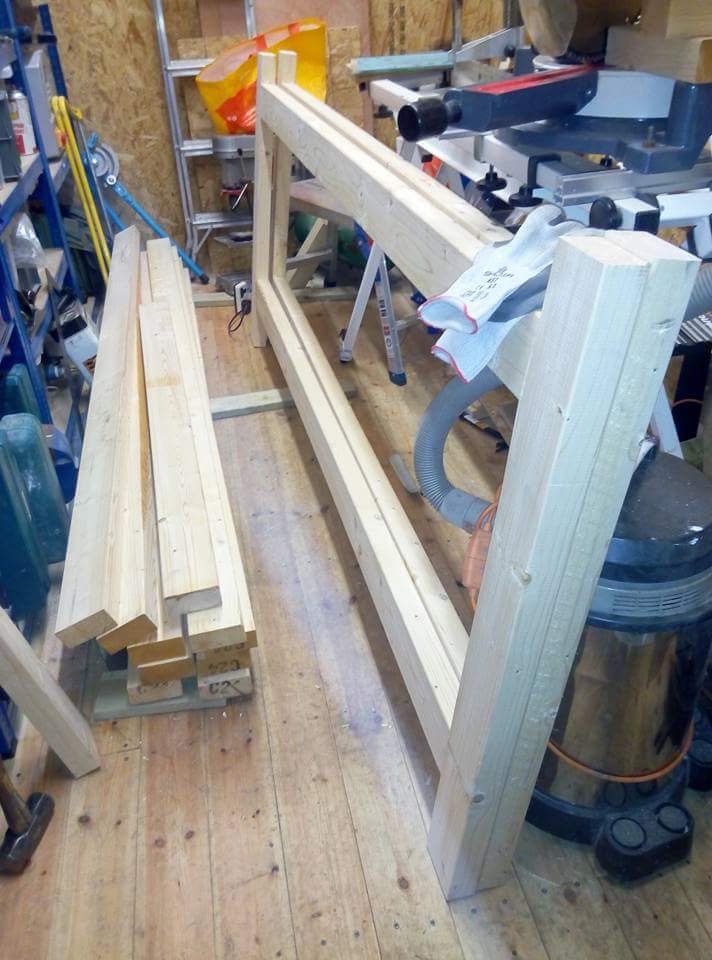
Long front and back ready.
I fitted a diagonal bracer to the back of both benches to further strengthen them,
Starting to make the tops.
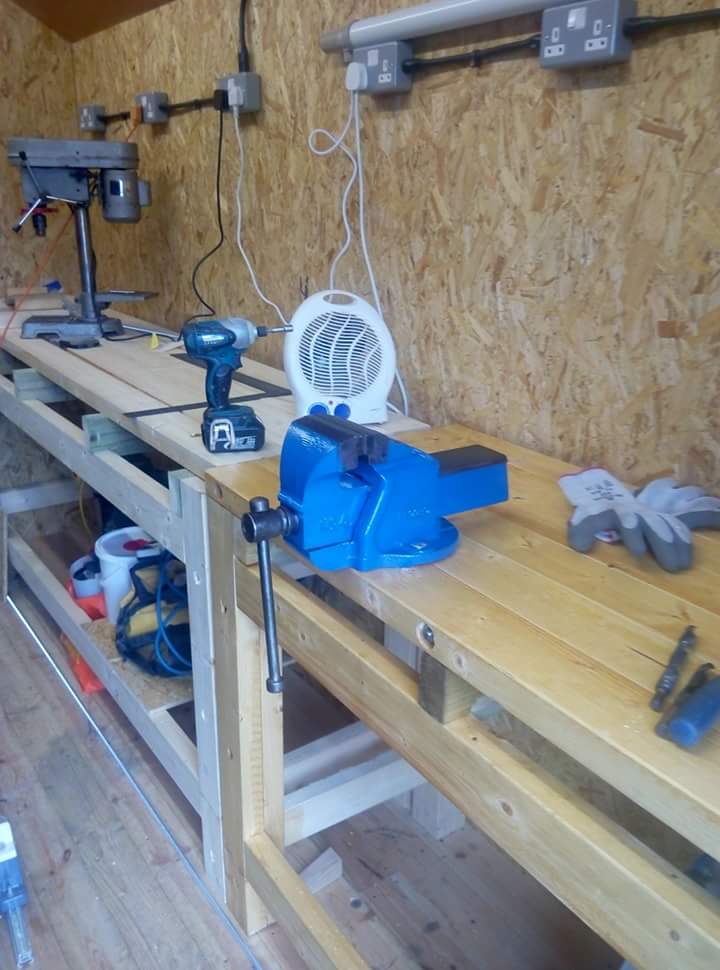
Ten years since I moved into this house and I've finally got an Engineers vice, mounted at the correct height, on a solid bench. I've had the vice for longer than that, bought at a farm sale but I stripped it, overhauled it and gave it a coat of paint prior to mounting it on the bench. I've also given the bench frame and top a coat of deck oil.
Tube heater providing frost protection and keeping the shed dry, fan heater for making it really cosy. Once I've worked out where everything is going I'll mount the tube heater low down and on its own circuit. So far, even in the coldest weather the shed has only gone down to 5°C with just the one heater. I have another tube heater to install if the shed needs it (they're 70 Watts each) and I'm currently logging the internal and external temperatures and the dew point to decide how much heat to use. I don't mind it being cold in the shed as the fan heater pulls the temperature up really quickly if I'm feeling the cold but I don't want condensation forming on my tools.
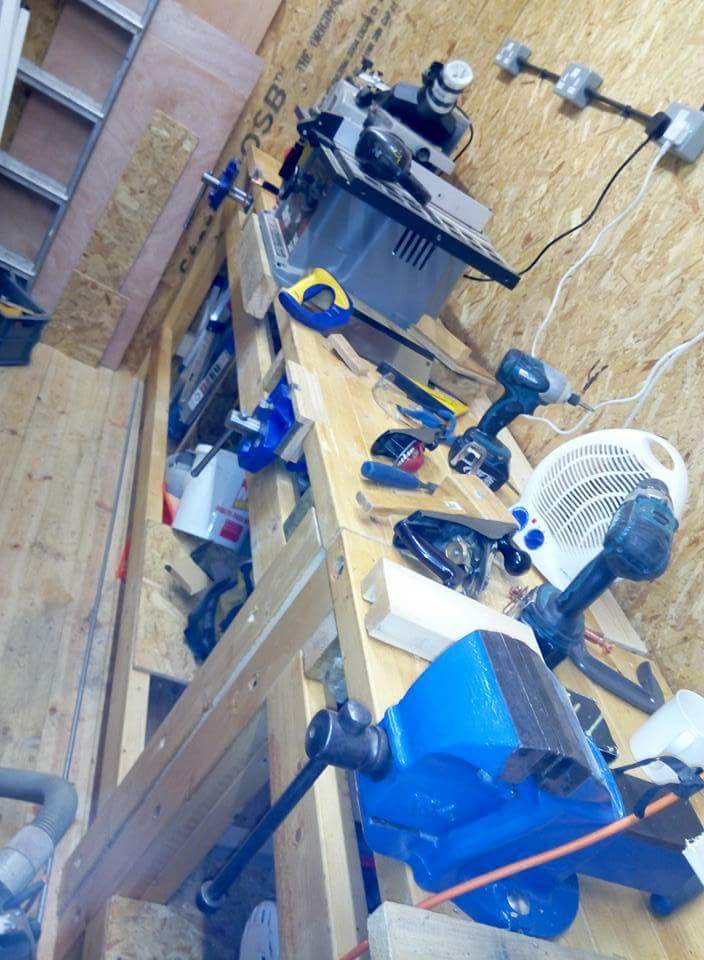
A couple more shots, long bench now with a pair of wood working vices. The workshop is slowly getting organised, I've fitted two lower shelves to the benches which gets some of larger pieces of kit off the floor.